Archibus SaaS / Maintenance / Define Workflow / Manage Service Level Agreements
Corrective Maintenance / Service Desk Manager / Manage Service Level Agreements
Creating SLAs for Corrective Maintenance Using the SLA Console's SLA Wizard (Edit Details)
The SLA wizard is the complete form for creating SLAs from the SLA Console. You can use this form to create SLAs that have more instructions than can be created from the quick action pop-up form.
Using the SLA wizard, you define SLAs and can save their workflow and service levels as templates. These templates can then be used when creating SLAs from the quick action pop-up form. See Option 1 - Creating SLAs using the SLA wizard for information on when to use this method.
Note: There is no need to create a catch-all default SLA to prevent orphaned requests because the application ships with default SLAs as part of the Schema database. The default SLA has a request type of SERVICE DESK – MAINTENANCE and an ordering sequence of 1. If no other SLAs are defined, or if a work request does not match with any other SLA, the system matches the work request to this SLA. You can edit these default SLAs, but you should not delete them.
Note: As shown in the below image, when entering an SLA, you can use the Add More button to select multiple values for several options (such as buildings or equipment standards). This is handy when multiple request parameters all have the same workflow and service level. For details, see Creating Multiple SLAs at Once by Grouping.
Access the Edit Details SLA Wizard for creating SLAs for corrective maintenance
To create an SLA using Edit Details:
- Select Manage Service Level Agreements task.
The Manage Service Level Agreement grid shows a list of the SLAs already defined.
- Click Add New SLA, and select Corrective Maintenance SLA from the submenu that appears.
The Add New SLA form appears.
- Click Edit Details.
The Step 1 Requests form appears.
Step 1: Requests
You can make the SLA as specific or general as you need by completing the Request Parameter options. You can select multiple request parameters if they all have the same workflow and service level. See Creating Multiple SLAs at Once by Grouping.
Use the Step 1 - Requests tab to get started defining your SLA.
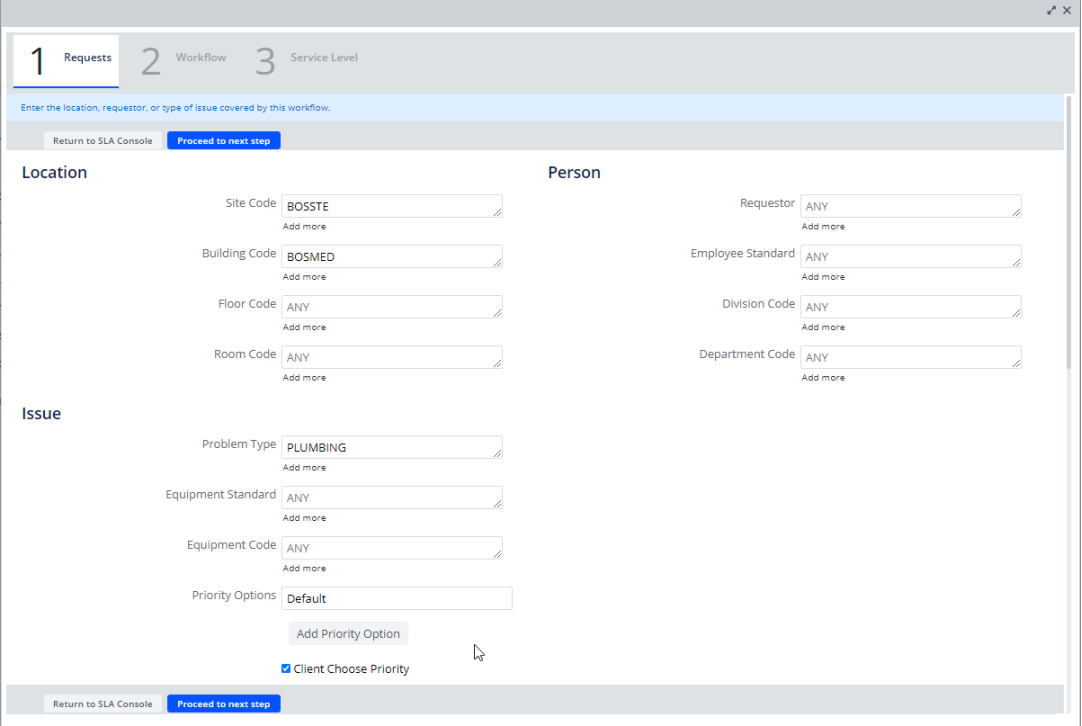
You can specify request parameters for particular staff, locations, equipment, problems, and organizations by completing the appropriate fields. For example:
- If the SLA applies only to a specific site or building, enter this in the location fields.
- You can define an SLA for the general needs of all staff, but define a specific SLA for the needs of a top executive by choosing the executive from the Requestor list.
- Maintenance for a computer equipment room may have its own SLA given the importance of this room to the overall operations of the company.
- For SLAs of the request type
SERVICE DESK - MAINTENANCE(on demand work), you will also want to complete the Problem Type field, to indicate the type of maintenance problem to which the SLA pertains, such as a leak or spill. - Additionally, the Problem Types table includes actions that you may want to take when using the Hazard Abatement application, such as abatement, inspection, or sampling. These problem types include the preface
CB|, such asCB|INSPECT. Also note that the Problem Types table includes records describing hazardous substances, such as lead and radon. You can create SLAs for hazardous substances; however, when working with the Hazard Abatement application, you will be limited to selecting Service Request types for Hazard Abatement actions (those with the prefixCB|.
Note: If an existing SLA has the same request parameters as those that you have entered, the system will notify you that it will not save the SLA as it is not unique.
- Define the request. You can enter the following by typing in the list and selecting from the list of values that match your typing. Or, you can click the Add More link to select from a list of all values.
- The location: If you handle work differently depending on its location, enter the location information here. For example, if work for a specific building is handled by a particular work team or supervisor, create an SLA for this building.
Tip: Select the location unit lowest in the space hierarchy first, and the units higher in the hierarchy are automatically filled in. For example, first select the building , and its associated site is automatically shown in the form.
Note: You can select multiple locations. However, when selecting multiple request parameters, you should multi-select on only one part of a multi-part key, so that the restriction happens correctly. In other words, multi-select only sites, or only buildings, not buildings and sites. Otherwise, some erroneous combinations can occur.
- Person requesting the work: Select the Requester, Employee Standard, Division or Department. Make these selections if you handle requests differently depending on the specific person requesting the work, the requestor's position in the organization, or the division or department making the request.
- Issue: In the Issue section, select the Problem Type, Equipment Code, and the Equipment Standard if needed.
- If needed, set a priority. If you do not select the 'Use multiple priority levels' check box, all requests are given the same priority. See Setting Priority Levels for an SLA.
- Optionally, set up the following steps:
- Confirmation. See Adding a Confirmation Step for Work Requests.
- Notification. See Adding a Notification Step for Work Requests.
- Approval. See Adding an Approval Step for Work Requests.
- Click Proceed to Next Step.
Step 2: Workflow
The Step 2 - Workflow form enables you to enter the steps for executing this workflow. These steps describe what should happen when the work has each status.
If you selected multiple priorities for the workflow in Step 1 Requests, the Workflow step has tabs to define a different workflow for each priority level. When the form first appears, the tab for the Level 1 (default) priority is shown. If you did not define priorities, there is only one tab for the default priority.
If you have already saved the workflow for an existing SLA for on demand work as a template, you can prefill the new SLA from this template. If needed, you can change the dispatch option for the workflow right from the template selection form.
To prefill the workflow from an existing SLA template:
- Click Find SLA at the bottom of the Step 2 form.
The form to select the SLA shows a list of the workflows for all SLA workflows that you have saved as templates.
- Select the workflow from the list.
The check box to select a different dispatch appears. Often, the workflow for SLAs differs only in the dispatch used, so this form enables you to make this change immediately if needed.
- To use a different dispatch option than this workflow uses, select this check box
The dispatch options appear on the form.

- Select the option button to dispatch the work request to a work team or to a supervisor, and enter the work team or supervisor into the form.
- Click OK.
- On the Step 2 - Workflow form, click Next to proceed to the Step 3 - Service Level form.
To create the workflow using the SLA wizard , you can make the following selections from the form.
Note: This procedure describes adding the optional steps that are included with the application 'out-of-the-box'. However, the steps that are available to be added at each status are configurable. For this reason, the form might show additional steps, or the definitions of the steps might differ from what is described below. For more information, see Manage Service Desk Steps.
Requested Status

Make the following selections for what should happen when the work has the Requested status.
- Approval. If needed, select the check box to require approval. See Adding an Approval Step.
- Notifications. If you want the requestor of this work to receive email each time the request changes status, select the 'Notify Requestor of all status changes' check box. Otherwise, you can set notifications to occur for specific statuses by clicking the Add Notification link for that status.
- Enforce workflow. If a craftsperson or supervisor edits request parameters for a work request that follows this Service Level Agreement and this check box is selected, the work request Status is returned back to Requested and the work follows this workflow from the beginning. If unchecked, the workflow will continue from its current status. See Editing Request parameters for a description of how the application handles this.
- Optionally, you can define additional steps for Requested work. When you define these steps, the system enforces them; that is, the work cannot move to the next status until the step is completed.
- Add Confirmations. These are approvals, or estimation and scheduling approvals that do not include the ability to edit the request. See Adding a Confirmation Step for Work Requests.
- Add Notification. See Adding a Notification Step for Work Requests.
- Add Approval. Use this link to add another Edit and Approval step. See Adding an Approval Step for an SLA.
Approved Status
When a request is approved, it must be dispatched so that the assignment is known when the work is issued . For this reason, a dispatch step is required.
You can now assign a craftsperson based on a Service Desk Role, rather than assigning to an individual craftsperson. For example, suppose you want to assign all AHU preventive maintenance to the craftsperson whose trade is "Multi-Trade", but that person is different in different locations. Instead of setting up one SLA per location, you can assign the work to a craftsperson using one SLA by having the system select the right person based on trade and location.
Make the following selections for what should happened once the work is approved:
- Auto Create Work Order: If you are using work orders to group your work requests, select this check box to automatically create a work order for this work. You cannot dispatch to a dispatcher if you choose this option.
- Auto Issue: If you want to expedite work for this SLA, so that it is automatically issued, select this check box. In this case, you will need to specify a work team or a supervisor to whom the work will be issued. You cannot dispatch to a dispatcher if you choose this option
- Dispatch. Select one of the following:
- Dispatch request to a work team: To dispatch to a work team, select this option button, and type the work team in the field. A list of work teams that match your typing appear. Select the work team from the list.
- Dispatch to a supervisor. To dispatch to a supervisor, select this option button, and then type the supervisor in the field.
- Assign request to a dispatcher. (This option is not available if you are auto-issuing the work, or auto-creating the work order.) To assign the request to a dispatcher who will determine how it is assigned, select this option, and click the Add Dispatch Step link.
For more information on the dispatch options, and defining the Dispatch step, see Selecting the Dispatch Options for Work Requests.
- Select the Craftsperson Code and enter the Default Duration for this work. This will automatically schedule the specified craftsperson for the work, and use the estimated number of hours as the estimate for the work.
- Schedule Immediately. If you enter a Craftsperson Code above, and then select Schedule Immediately the work is scheduled as soon as it is created, so that work can begin immediately. Otherwise, work is dispatched on the next available service day.
Assigned to Work Order Status

Optionally, you can select the following steps for the work when it is assigned to a work order: Because these steps are defined in the SLA, they will be enforced: the work request will not progress until these steps have been completed. Select the following links to add these optional steps.
- Add Confirmation step - This is an estimation or schedule approval without the ability to edit. See Adding a Confirmation Step for Work Requests.
- Add Estimation step / Add Scheduling step - See Adding an Estimation or Scheduling Step for Work Requests,
- Add Notification step. See Adding a Notification Step for Work Requests.
Issued Status

You can select the following steps for the work once it is issued:
- Notify Craftsperson: Select this check box to send email notification to the assigned craftsperson when the work is issued.
- Add Checklist. This option presents a pop-up form so that you can specify a checklist to be completed during the Issued status. See Adding Checklists to Maintenance SLAs.
- Add Notification: Click this link to add a notification. See Adding a Notification Step for Work Requests.
Completed Status
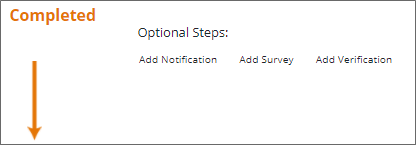
You can define the following steps for complete work by selecting the following links:
- Add Notification step. Add a notification when the work request is completed. See Adding a Notification Step for Work Requests.
- Add Verification step. Set up a verification step that requires verification of the work before it can be closed. See Adding a Verification Step for Work Requests.
- Add Survey step. See Including a Satisfaction Survey with a Completed Work Request.
Closed Status

You can define the following steps for closed (archived) work by selecting the following links:
- Add Notification step. Add a notification when the work request is closed. See Adding a Notification Step for Work Requests.
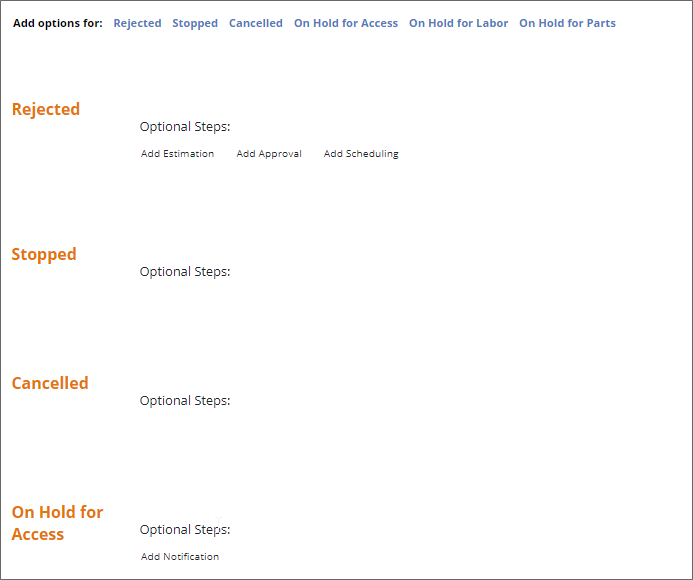
Add Options for Rejected, Stopped, Cancelled, On Hold Statuses
Optionally, you can define service desk steps for the work when it is rejected, stopped, or cancelled. See Manage Service Desk Steps.
Save as a template
Optionally, save this workflow as a template. This makes it available to prefill other SLAs either when working from the SLA wizard, or when using the quick action pop-up form.
- Click Save As Template at the bottom of the Step 2 Workflow form.
- In the Save this On-Demand Workflow form, enter a descriptive name for this workflow. The system provides a suggestion in the Name field, but change this if you would like a different description.
- Click Save.
Click Next on the Step 2 - Workflow form to proceed to the final step.
Step 3: Service Window
To prefill the Service Level step:
- Select the Find SLA link.
- Select the Service Level from the list.
- Review details for the service level.
- Click OK.
- The Step 3 - Service Level form appears. You can make changes to the service level if needed.
The bottom of the screen includes a summary of the selections you have made.
- After reviewing the SLA, click Save.
- Enter the following information:
- Service Window Start / Service Window End. Enter the time frame during which this work can be done.
- Service Desk Manager. Select the person who is responsible to move the work along.
- Optionally, make other selections as needed. You can specify the time to respond, the time to complete, whether work is allowed on holidays for this type of request, the days of the week that this work can be performed, and the Service Contract Code. The service contract defines your agreement with the employee or vendor who provides this service. If you select a service contract, you can then click Details to see its information.
- Click Save on the Step 3 - Service Level form.