Space / Moves / Move Coordinator
Issuing a Move (Legacy)
Note: Beginning with Archibus V.24.1, the tasks for issuing moves were removed, as the Move Console provides the same functionality from a consolidated console that enables you to work with both individual and group moves. See Legacy Move Coordinator Tasks. This help topic is for those sites who prefer to work with the legacy tasks. For information on issuing moves with the Move Console, see Issue Moves (Move Console).
After a move has been approved by all approving managers or by the auto-approve function, the move is ready to be issued by the move coordinator.
The Issue form includes the same information that is entered on the Review and Estimate form. If necessary, complete fields that you have not yet completed.
You can:
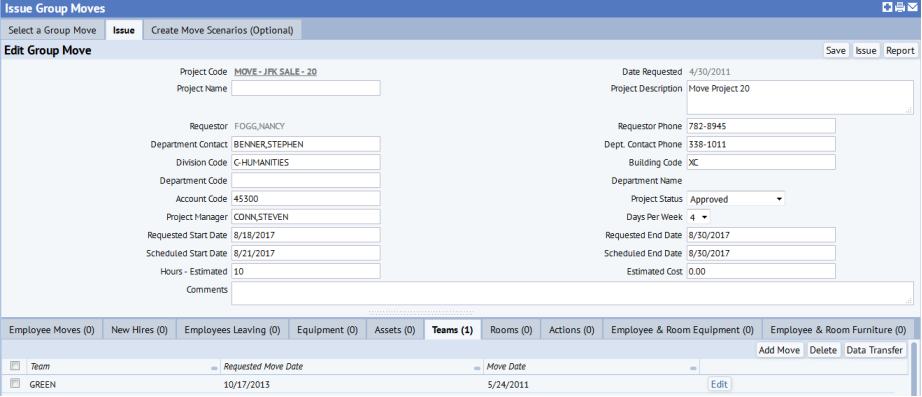
- for group moves, add employees, employees leaving, new hires, assets, equipment, rooms, or teams to the group move or adjust the lists of an employee's furniture and equipment by working with the appropriate tabs at the bottom of the view. These are the same set of tabs found on the Request Group Move task. For information on working with these tabs, see Request a Group Move.
- for individual moves, delete assigned items by working with the tabs at the bottom of the view. These are the same set of tabs found on the Request Individual Move task. For information on working with these tabs, see Request an Individual Move.
- add any additional actions that are required for the move
- generate move scenarios for employee group moves, using the Create Move Scenarios tab. You can create multiple scenarios and then compare the results. After you select the scenario that best suits your needs, you can automatically update the move orders' room destinations with the assignments in the selected scenario. See Move Scenario Planner Overview.
After you issue a move, the system generates email notification to the following:
- move requestor
- department contact
- any craftspersons or employees who have been assigned actions
- move coordinator (individual moves)
- project manager (group moves)
If you decide that you don't want to issue this move order, you can cancel it. See Canceling Approved Moves.
Procedure
Prerequisite: If your move scenario is based on a layout scenario, the CAD user must first merge the selected layout scenario with the official inventory. Otherwise, new rooms that you created as part of the layout scenario will not be available when the Issue command verifies that the "To" location fields of the move project exist in inventory.
- Select the Move Coordinator / Issue Moves or Move Coordinator / Issue Group Moves task.
- Select the move you
want to issue from the Approved Group Moves list.
The Issue tab appears. - Add additional values that have not yet been entered for the move by working with the appropriate tabs. Verify the following:
- Values exist for the Move Date, Move Coordinator, and Move To fields.
- Values exist for the Project Manager and Scheduled Start Date fields of group moves. In addition, enter values for the Move Date and Move To fields for each move within the Group move project.
- If you worked with a layout scenario and changed the space configuration (such as creating new rooms), be sure to have the CAD operator merge the layout scenario with the inventory. The Issue command verifies that all To locations in the move project exist in inventory; if you updated the move project with locations from a layout scenario, it is possible that the move project contains new rooms from the layout scenario that do not exist in inventory. Merging the layout scenario with the inventory ensures that the To locations exist in inventory and that the Issue command will be able to verify that these rooms exist and not generate an error.
- For each move order that does not have a Move Date, the Issue command sets the Move Date to
the Scheduled Start Date value that has been set
for the move project. You can change this date by making an entry in a move order's Move Date field that is different than the move project's Scheduled Start Date field.
- If you have not yet done so, add a new action with the Add Action button.
Note: Before issuing a move, enter values for the Date To Perform and Assigned To fields for all of the move's actions. For more information on adding actions, see Adding Move Actions.
- For group moves, check the Move Project Status. You can choose:
- Approved
- Approved In Design
- Approved Canceled
- Click the Issue button to issue the move.