Archibus SaaS / Maintenance / Maintenance Console
Maintenance / Corrective Maintenance / Maintenance Console
Maintenance / Preventive Maintenance / Maintenance Console
Craftsperson: Work with Maintenance Checklists using the Maintenance Console
In addition to using the Maintenance mobile app to complete maintenance checklists for a work request, as a craftsperson executing a work request, you can use the Maintenance Console to complete maintenance checklists associated with a work request.
You can complete the checklists:
-
while in the field if you have access to the Maintenance Console on a laptop or tablet
-
when you return to the office after executing the work, you can access the Maintenance Console on an office computer.
This topic has the following sections:
Access Checklists through the Maintenance Console
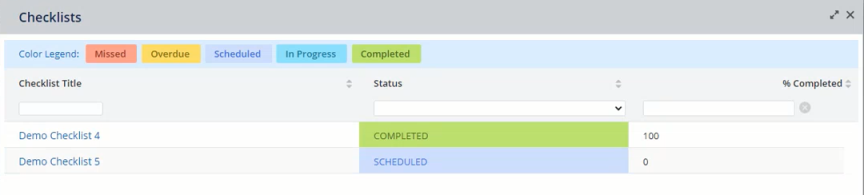
When you sign into Web Central as a craftsperson, the Maintenance Console presents your assigned work requests. Work requests that are listed in the Issued and in Process heading will indicate checklist actions, as shown below.
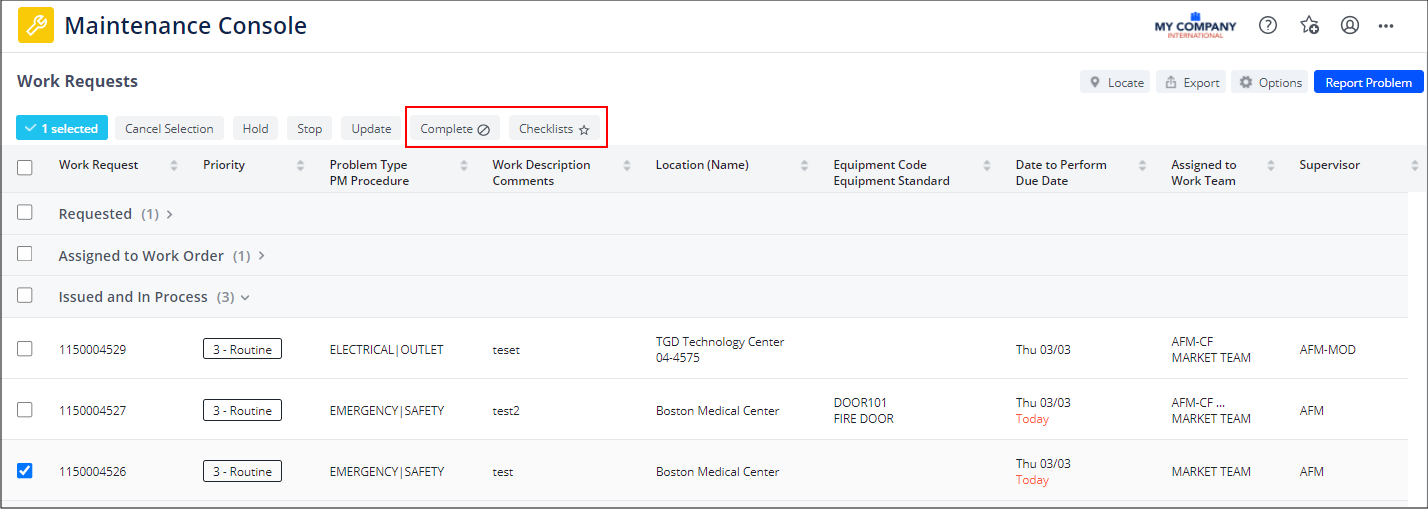
Checklist actions have these possible displays on the Maintenance Console:
| Checklist Icon | Example | Status | Description |
|---|---|---|---|
| Star |
|
Issued |
The work request has at least one incomplete checklist. The Complete icon lists a stop icon since there are outstanding checklists. |
| Check Mark |
|
Issued | All checklists for this work request have been completed. |
| Green Check Mark with Green Label |
|
Completed |
All checklists for this work request have been completed and verified. |
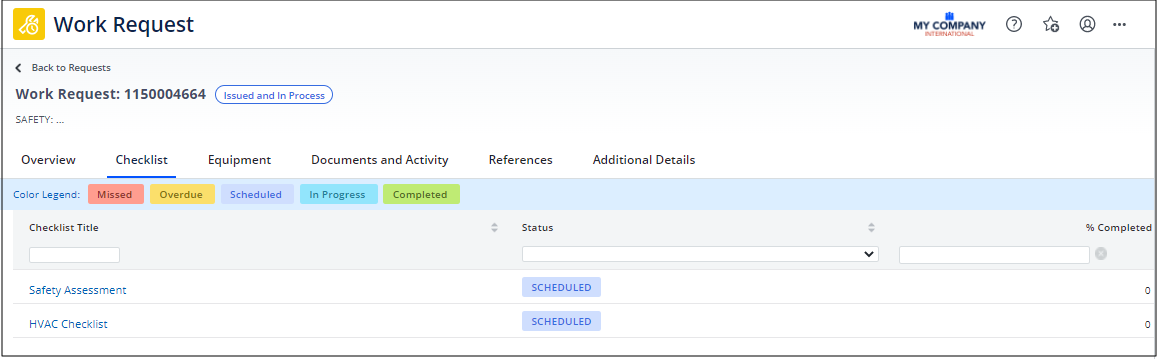
You can also access checklists from the Checklists tab on the Work Request form. The Checklist tab appears only if the work request has an associated checklist.
If the request has multiple checklists, you see only the first checklist; the next checklist will become available when you complete the first checklist.
For some PM work requests, the checklists might be designed such that you see all checklists in the Checklist tab and you execute the checklists in the order in which you choose. This behavior is controlled by the designer of the checklists and applies only to PM work requests.
Work through a Checklist
-
In the Maintenance Console, move to the Issued and in Process band and locate requests that have a Checklist action with a star.
-
Click on the Checklist action, and the Maintenance Console presents the first checklist for you to complete.
-
This checklist may be new or one that you started but did not complete.
-
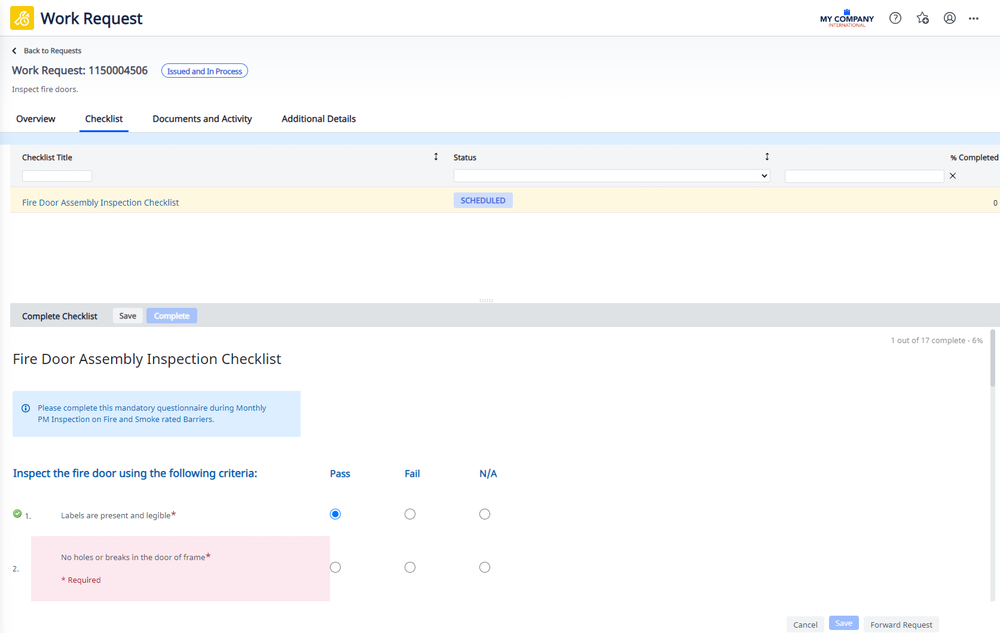
The Status (in the middle of the form) indicates the checklist's status. For information on statuses, see Extended Questionnaires: Events and Status.
-
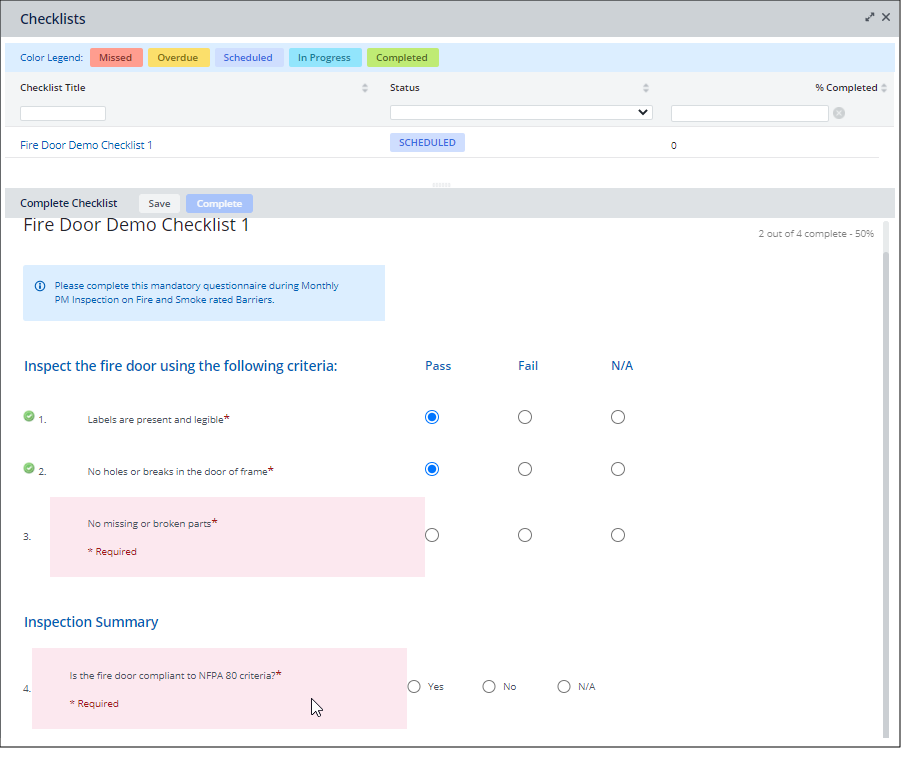
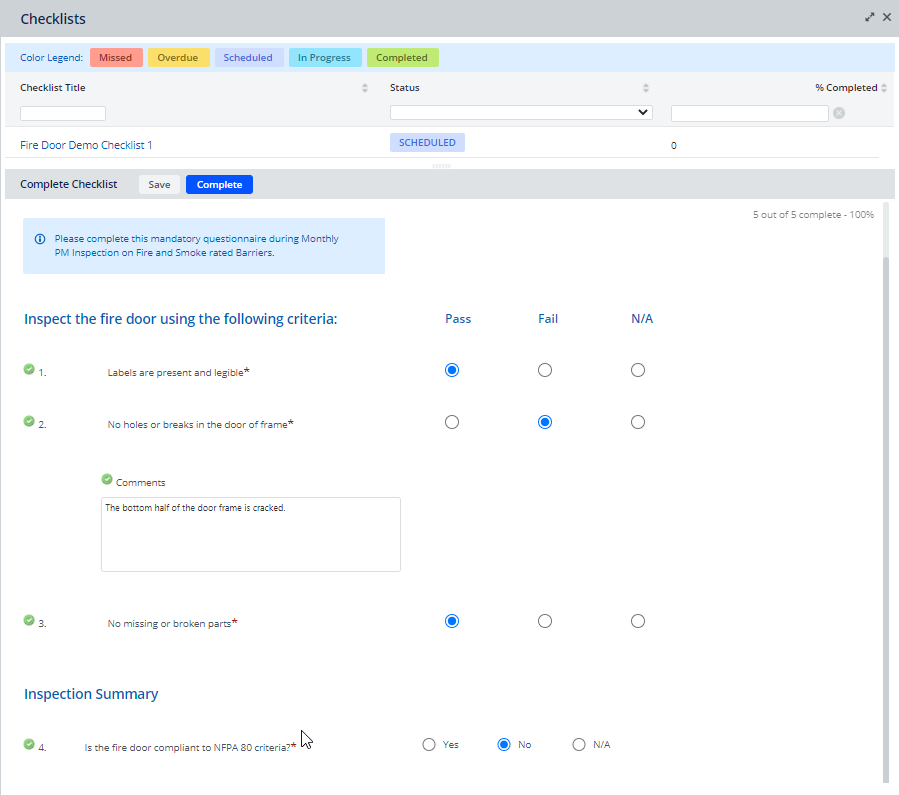
The checklist indicates required questions with red asterisks. As you work through the checklist, you will notice that the questions are outlined in pink boxes and that as you answer the questions, the form removes the pink boxes. The percentage update in the right corner of the checklist informs you of how many questions remain. For example, in the below image, the user has completed two questions, and two additional questions (in pink) remain to be completed. Once you complete a response, you can change it at any time until you mark the checklist as complete.
Additional Options
Depending on your response to a question, the checklist may present additional options, such as a comment box, additional questions, the opportunity to upload a document, the opportunity to create a work request.
For example, responding No to Question 2, below, presents a follow-up Comments box.
Additional Option: Create New Request
If your checklist offers the ability to create a new request and you do create a new request, the two work requests will be linked.
For example, if you are working through the checklist of Work Request A, and create a new work request (Work Request B) , the two work requests will be linked.
If you open Work Request A (the original work request) in Maintenance Console, and move to the Work Request Details popup, you will see the follow-up request (Work Request B) in the "Linked Request" section
Open the follow-up work request (Work Request B) in the Maintenance Console and move to the Work Request Details popup, you will see the original request (Work Request A) in the "Linked Request" section
Save an In-Progress Checklist
After you respond to the at least one question, the Save button activates. At any point you can save your results to date. The first time that you save, the checklist moves to In Progress status. In the Maintenance Console, the checklist action will show with a star.
Saving is handy in the case that you begin a checklist and then need to switch to another task.
When you return to the checklist, you can change any of the answers you previously completed.
Complete a Checklist
When all required questions are require no further edits, the Complete button (next to Save) activates.
Click Complete and the checklist's Status changes to Completed. You can no longer edit the responses.
If another checklist is associated with this request, the system immediately loads it. The checklist designer will have ordered the checklists in the appropriate order for execution. You can now work through the second scheduled checklist and click Complete to when done.
When all assigned checklists for a work request are completed, the Maintenance Console updates with a check mark. You can now complete the work order.
Note: The AbBldgOpsOnDemandWork.ForceCompleteChecklists application parameter controls whether or not a craftsperson must complete all checklists associated with a work order before they can complete the work order.
Edit a Checklist Rejected by a Supervisor
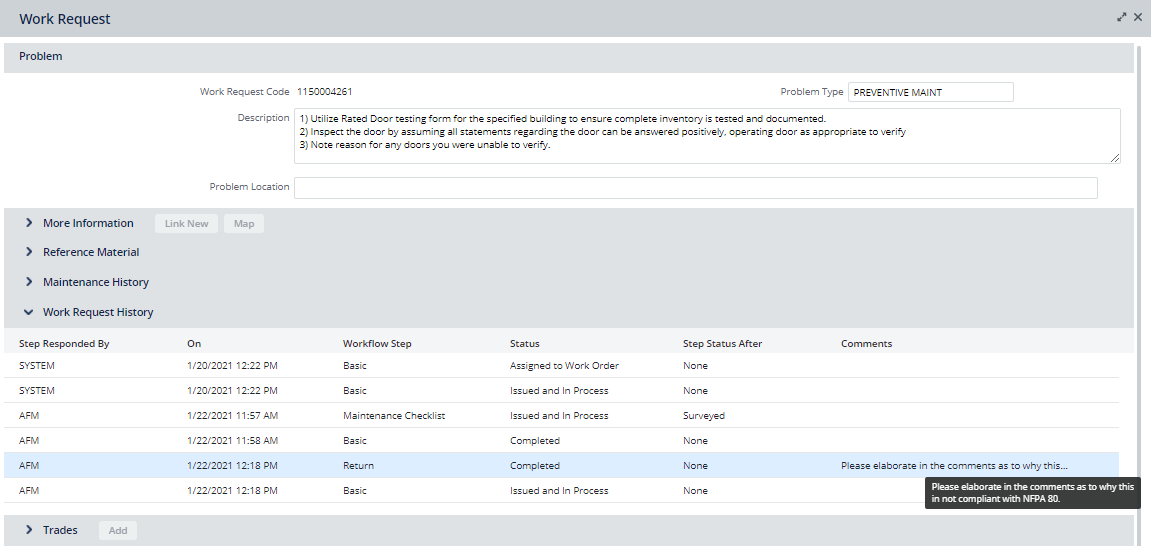
Your site may require supervisors to review and verify checklist answers. Upon review, a supervisor might send a checklist back to you for clarification. For example, you might need to elaborate on a comment, provide more photos, or change a response because an issue has been addressed. When the supervisor rejects the checklist, they enter a comment, which is recorded in the Work Request History panel of the work request. As a craftsperson, you can review the Work Request History section to find out why the request was rejected and what must be fixed.
When a supervisor rejects a checklist, the work request is set back to Issued and In Process status and the Maintenance Console shows the checklist action with a star.
The following is a typical procedure for updating the checklist:
-
On the Maintenance Console, locate the work request in the Issued and In Process section. Its checklist action will have a star.
-
Open the work request and expand the Work Request History section. Review the entries to find a Workflow Step of Return and a checklist comment. Hovering over the comment displays the complete text.
-
Now that you know the problem, in the Maintenance Console, click this request's Checklist action.
-
Edit the checklist as appropriate and click the checklist's Complete button.
-
You must now resubmit the work request. In the Maintenance Console, click the Complete action for this work request. The supervisor can now access this work request in the Completed section of the Maintenance Console and review the checklist again.
Note: If you are using a mixture of the Maintenance Console and the Maintenance mobile app to manage work requests, note that you will access a supervisor's checklist verification comment in the Step Comments field shown by the Maintenance mobile app. See "Editing a rejected checklist" in Maintenance Mobile App: Craftsperson.
See Also
- Extended Questionnaires: Events and Status
- Maintenance mobile app: Checklists
- Maintenance Console Overview
- Maintenance Checklists Overview