Space / Occupancy / Client (Transactional)
Request an Individual Move
Depending on practices at your site, several types of employees may need to request moves for themselves or for other employees. For example:
- Your site may permit any employee to request to move to another location.
- A department manager may request to move an employee to a new office that is bigger or less noisy than the current office.
- A department manager may have just hired as permanent staff a contract worker who has been situated in an office designated for contract staff and now needs to move to an office designated for permanent employees.
- A facility manager may be aware that a room has an undiagnosed odor and so wants to move the occupant from this room.
- A space manager may be responsible for moving employees who transfer between departments.
With the Request an Individual Move task, any employee with the appropriate access to this task can request a move for an individual employee. (For moving groups of employees at one time, see Request a Group Move).
The system manages individual moves through Archibus service requests, specifically the Service Desk- Individual Move type of service request. How the system processes your space request depends upon the Service Level Agreement (SLA) governing the Service Desk- Individual Move request type. An SLA is defined by your facility manager or service desk manager determines such factors as whether a request needs to be routed for approval, or if email notifications must be issued.
When choosing a destination room for your employee, be sure to take a few minutes to view the floor plan drawing so that you can see exactly where the room is located. For example, will the employee be near others in their department if moved to this room? If the employee has a physical condition, you may want to choose a room that is close to exits and rest rooms.
Additionally, the floor plan drawing highlights rooms that are available to the employee, distinguishing between rooms that are vacant and those that have at least one occupant but are designed to hold multiple occupants and are not yet at capacity. If you are a department manager trying to minimize the space you are charged for, you may want to fill all rooms to capacity before occupying vacant rooms; this strategy enables you to consolidate your rooms and then later release the vacant rooms so that you are not charged for them.
Step 1: Start the Request
Select Space / Occupancy / Client / Request Individual Move.
The system presents the Basic tab and fills in your name as the requestor and your telephone number (which you can edit). The system displays basic information about the SLA governing this request, which is not editable.
Press Next to continue to the Detailed Information tab.
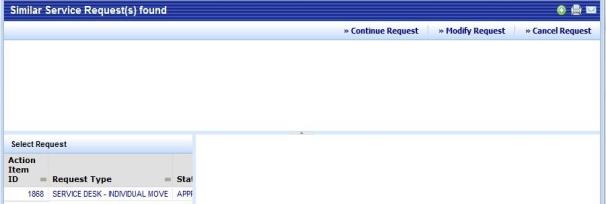
Note that if you have already made a request today, the system notifies you that a similar request exists. Choose Continue Request at the top of the form and you can continue with entering this new request. For move requests, the system does not support selecting the existing request and modifying it.
Step 2: Enter a Description and Date
On the Detailed Request Information at the top of the form, you specify the details of your move.
- Enter a description of why you are requesting this move or other notes about your request. Later, you will have the chance to pick the exact rooms that you want, so it is not necessary to do so in this option.
- Specify the date on which you want the move to take effect. Note that you must enter today's date or a future date. The system will charge you for space used according to the date specified in this option, so you will want to enter the most accurate date possible. For example, if a new employee needs the space beginning in two weeks, there is no need to enter today's date as the required date. Doing so would make the room unavailable for these two weeks and charge your department for use of the space during these two weeks.
- Enter a department contact within the department for the employee involved in this move by choosing a value from the list. For example, if you are a facility manager requesting a move due to a facility-related issue, you may wish to enter the department manager of the affected employee. You can choose any employee in the database for this option.
Step 3: Choose the Employee to Move and the Destination
In the middle pane, Assignments, you choose the employee to move and the destination room -- the room to move to.
- Choose the employee -- Complete the Employee to Move option by choosing an existing employee. The system automatically enters this employee's current location (primary room) in the From Location fields.
- If necessary, you can change the default from location using the Change From Location button. In the resulting form, you can choose another room or choose to not list a from location.
- For example, the employee may have a main (primary) room and a satellite room. The system automatically completes the fields with the primary location, but you can use this button to set the From Location to the satellite room.
- Choose the destination room with one of these methods.
- From a room list -- Select the "Select To Location" button and choose a room the resulting form. If you then want to see this room's location on the drawing, you can choose the Show Floor Plan button. The system will load the appropriate floor plan and highlight this room.
- From a floor plan drawing -- Load a floor plan drawing and choose the room from it. See Using the Floor Plan to Select the Destination Room.
- With either method, the system presents you with rooms that meet these conditions:
- have available capacity on the date of the requested move. For information, see Occupancy (Concept).
- have a room standard that is appropriate for the employee standard of the person requiring the room. The system uses the rmstd_emstd table and adheres to the below rules. These relationships are established with the Background Data / Assign Employee Standards to Room Standard task.
- Employees with Employee Standards that are not listed in the rmstd_emstd table can have a room of any room standard
- Rooms with Room Standards that are not listed in the rmstd_emstd table can be requested by any employee standard.
Note: If you have access to the Space Manager process, your drawing will show the status of all rooms on the floor, and your room list will list all rooms. You will be able to assign employees to over-capacity and at-capacity rooms, as well as rooms that do not match the employee standard of the employee being placed. This approach provides the Space Manager with flexibility in temporarily placing employees until more space becomes available.
- Whether you select the room from the list or from the drawing, the system complete the To Location fields with this room.
- (Optional) Add any supporting documents by completing the document fields. For example, if the employee is moving because the current room has an unresolvable maintenance problem, you could upload a picture of the problem. If the employee is a new hire, you may wish to include documentation from Human Resources. For information on using the document fields, see Using the Document Management System.
- Choose the Submit button in the upper right corner.
Step 4: Review your Request
Once you select the Submit button, the system presents the Overview tab so that you can review your request.
If you want to create another, choose Create New Request in the upper right corner.
Next Steps
Once you request a move order, the system processes it according to the service level agreement (SLA) governing this request. For example, the SLA may define that it be routed for approval to one or more parties. Or, the SLA may define that the request be passed to the Moves application for additional processing, such as cost estimating. Similarly, the SLA may define that as requestor, you receive notification of the progress of the move request.
Each site can configure a workflow process that reflects the needs of their particular site. For information, see Service Request Workflow for Move Requests and Departmental Space Requests.