Archibus SaaS / Maintenance / Corrective Maintenance / BIM Viewer
Maintenance / Corrective Maintenance / Supervisor / BIM Viewer
Assets / Assets / Asset Manager / BIM Viewer
Assets / Enterprise Assets / Facility Asset Manager / BIM Viewer
BIM Viewer: Explore Rooms
In addition to using the BIM Viewer to visualize your building's assets, you can use the BIM Viewer to visualize the rooms in your building.
From the Rooms tab of the BIM Viewer, you can load a floor plan within the model and perform such tasks as:
-
highlight rooms by properties such as Room Category, Room Type, Division or Department
When exploring the room features of the BIM Viewer within the sample HQ project, you will want to work with building MC10, which has several rooms represented in the model and quickly loads.
This topic has these sections:
Examine Rooms in Floor Plans
When you work with the BIM Viewer's Rooms tab, the BIM Viewer shows a floor plan rather than the three-dimensional model of the entire building as you see with the Assets tab or Work Requests tab. You are limited to working with one floor plan at a time because if the viewer tried to display two or more floors, you would not be able to see the highlights on the bottom floors if they sit on top of each other.

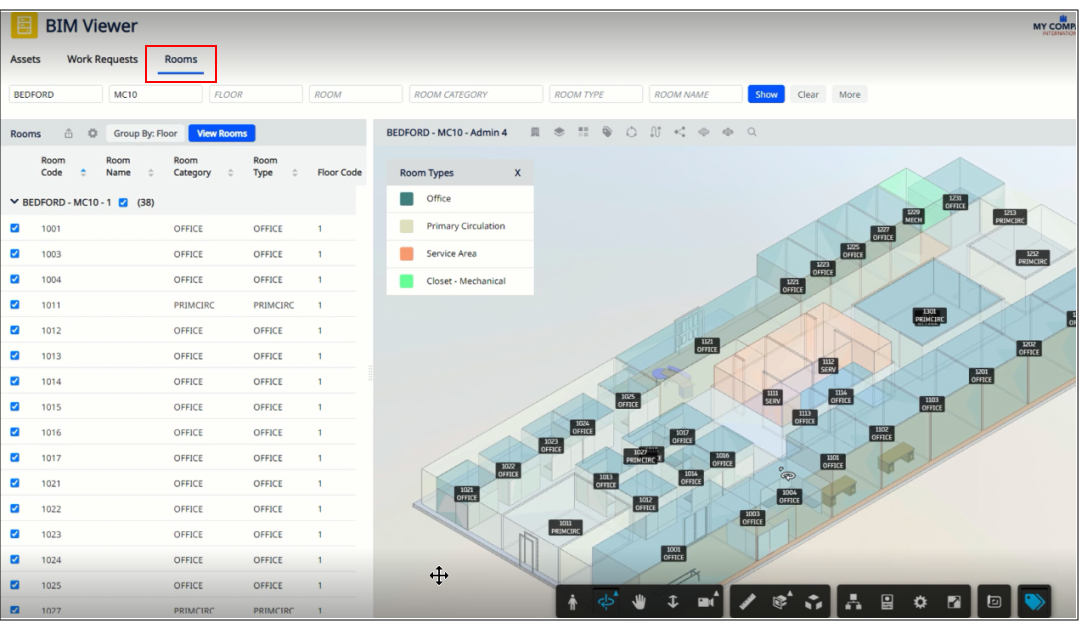
Although the BIM Viewer by default displays the floor plan, you can use the Forge toolbar's Orbit command to display the floor plan in 3D if you prefer. For example, in the below image, the user has use the Highlight command to highlight rooms by category and then used the Orbit command to display the floor in 3D.

Work with the Rooms List
When you use the Buildings command to load a model and move to the Rooms tab, a list of rooms display in the Details pane on the left. The rooms are automatically grouped by floor; further grouping options are not available as they are when working on the Assets tab.
Expand the Room List
Once you load a model, the Rooms list displays the rooms of the model, grouped by floor. Each floor grouping provides a count of the rooms on that floor.
Expand a floor grouping to see the list of rooms on the floor.
Select Rooms
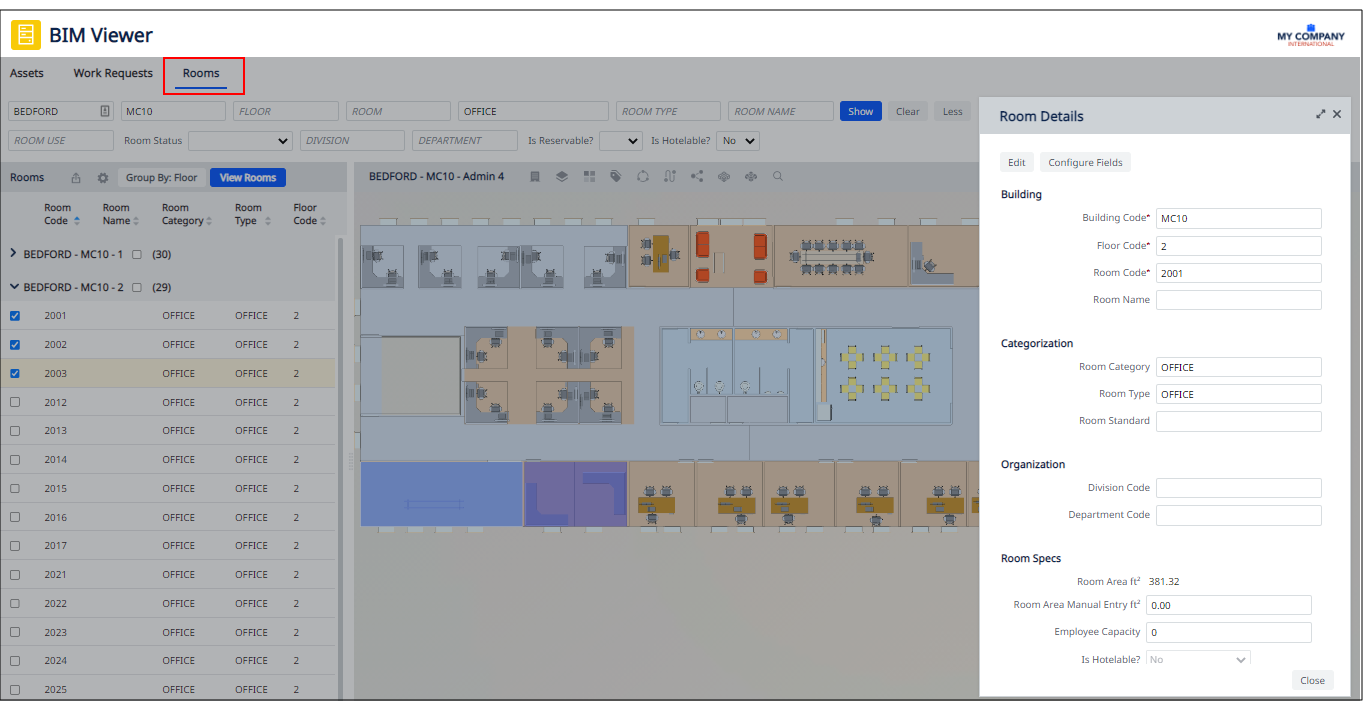
Like the Assets tab, you work with the Rooms tab by selecting the checkboxes next to each room or floor to define the set of rooms to examine in the viewer. Complete the checkboxes and then click the Show Rooms button.
To work with all the rooms on the floor, select the checkbox next to the floor grouping. This selects all the rooms in the grouping.
You can also select a set of rooms on one floor, as shown in the above image. Since rooms are presented in the viewer in floor plans rather than the entire model, you must work with rooms on the same floor. If you select the checkboxes of rooms on different floors, you will be prompted to make a new selection within one floor.
Sort the Room List and Change the Set of Displayed Fields
The Rooms pane displays records from the Rooms table. To change the set of displayed fields, use the Select Fields icon. You can also change the sort order of the Room records by clicking on the icons next to each field.
These tools operate in the same manner as they do in the Assets tab. For information see Set Information to Display (Fields command) and Sort the List.
Export the Rooms List
Once you set the Details pane to show the desired information, you can export its contents to Excel using the Export icon, located to the left of the gear-shaped icon.
See Also
Search for Rooms in the BIM Model