Archibus SaaS / Foundations / Facility Services / Service Console
Workplace Services / Service Desk / Service Provider / Service Console
Manage Workspace Requests
When self-service users request working space using the Archibus Workplace, the request is automatically approved, email notifications are sent, and the space is designated as no longer available for other users. No further actions are required by the requestor or the manager to ensure that the space is reserved. However, a manager should still monitor the request in case it needs to be cancelled or documented. For this reason, the system consults the SLA for the SERVICE DESK-HOTELING request type and determines the Assigned To value; it then displays this request in the Approved section of this user's Service Console.
The manager can take the following actions from the Service Console:
- Review workspace details
- Cancel workspace request
- Enter a comment about a workspace request
- Reassign the workspace reservation (booking)
In order to work with workspace requests in the Service Console, first display them in the Service Console by selecting Show Workspace Requests from the gear icon. Since workspace requests are automatically approved, they appear in the Approved section of the Service Console.
The Workspace Bookings report provide summaries and statistics about your workspace requests.
Note: In the Reservations module, workspace requests are known as bookings.
Note: In order for Workplace users to request work spaces, they must have a license for the Reservations module. Without this license, Workplace does not display the options for requesting working spaces.
Review workspace request details
Select a workspace request by clicking on its selection box in the left column.
The Hoteling Space Bookings Details form lists the details of the workspace booking.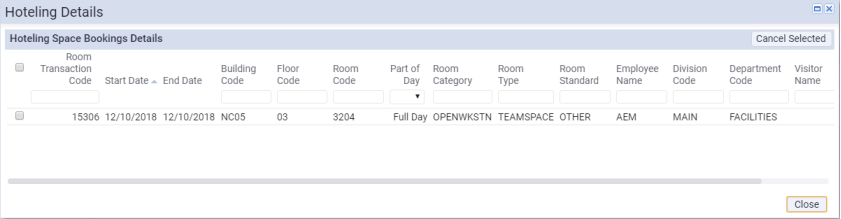
Cancel workspace requests
If circumstances change and a working space is no longer required, you can cancel the workspace request and free up the room for others. Since self-service users cannot cancel workspace requests from Workplace, as a manager you can cancel them from the Service Console.
You can cancel workspace bookings that were scheduled to happen in the past. This is useful for updating the system if the space was never occupied. Canceling a booking ensures that is not included in the service request reports.
- Select a workspace request by clicking on its selection box in the left column.
- In the resulting Hoteling Details form, click the Cancel button in the upper right corner.
- The Service Console removes the workspace reservation from the list of Approved requests.
- The Service Console is set with a permanent restriction to show only those workspace reservations that are not rejected, cancelled, or closed. Because of this permanent restriction, if you have opted to view canceled requests, the Service Console will not display this item in its Canceled section.
- The system generates email notifications to the requestor and supervisor.
Enter and review comments about the workspace request
You may want to enter a comment about a booking.
- Select a workspace request by clicking on its selection box in the left column.
- Click the Actions drop-down menu in this row, and click Comment.
- Enter the comment in the resulting form. Any comments that were previously made display in gray with the time and date they were entered.
Reassign workspace requests
Although there is no real action to take on a workspace request, you can assign it to another service provider for monitoring. For example, you might reassign the workspace requests to the department managers of those users requesting working space. These users can then monitor the requests using Service Console. Once you reassign workspace bookings, they will not appear in your Service Console.
- Select a workspace request by clicking on its selection box in the left column.
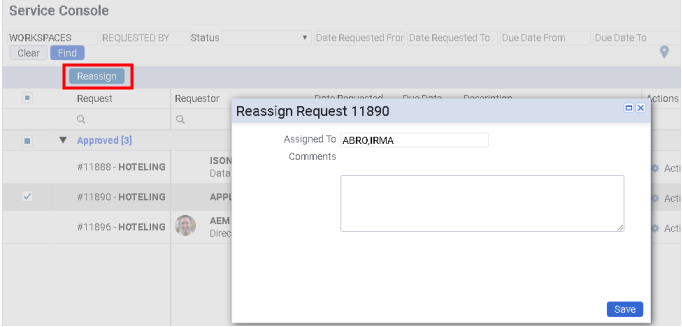
- Click the Reassign button beneath the filter. Alternatively, click the Actions drop-down menu in this row, and click Reassign.
- In the Reassign Request form, choose an employee for the Assigned To field by clicking on the ellipses button and selecting an employee from the list.
- Enter a comment to document this change.
- The system generates email notifications to the requestor, new service provider, and supervisor.