Archibus OnSite
Complete Checklists for Work Requests
As part of addressing the remaining PM work requests, Will completes a work request that has assigned checklists -- a series of steps or questions pertaining to the execution of the work request. For example, a checklist might outline the safety points to verify before beginning a job or might provide a series of questions to answer about the condition of an equipment item.
You can have multiple checklists assigned to a work order. Depending upon how the checklists are designed, you will complete them in a specified order, or you will see them all in the work request and you can complete them in the order you choose.
Access the Checklists
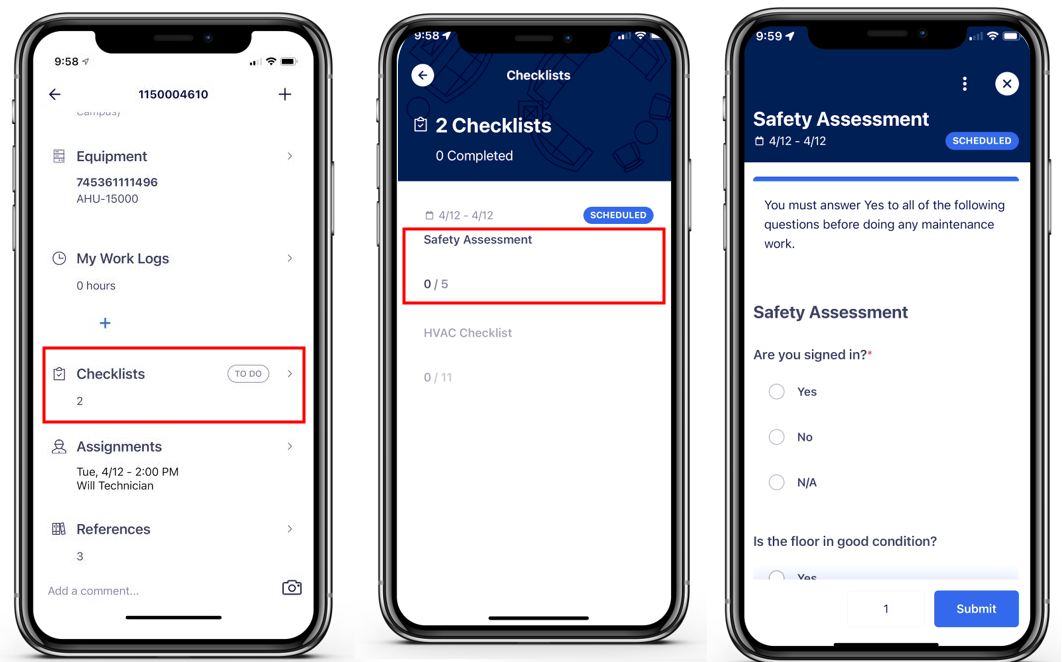
As part of the work request for servicing an HVAC item, Will sees that he has two checklists to complete (left screen, below). He taps on the checklist entry to expand it, and moves to the Checklists screen, with the Safety Assessment checklist available for him to complete (middle screen).
The Checklists screen shows Will summary information about the checklist: its name and the number of questions he has completed so far (0/5 and 0/11). Thus, Will has two checklists that have not been started.
In this case, the checklist designer has specified that the Safety Assessment checklist must be completed before Will can work on the HVAC checklist; thus, the HVAC checklist is not available for selection. However, for PM work requests, the checklist designer can specify that all checklists are available for execution and the craftsperson can choose the order in which to execute the checklists.
Will taps the Safety Assessment checklist, and the checklist questions load (right screen).
Work through a Checklist
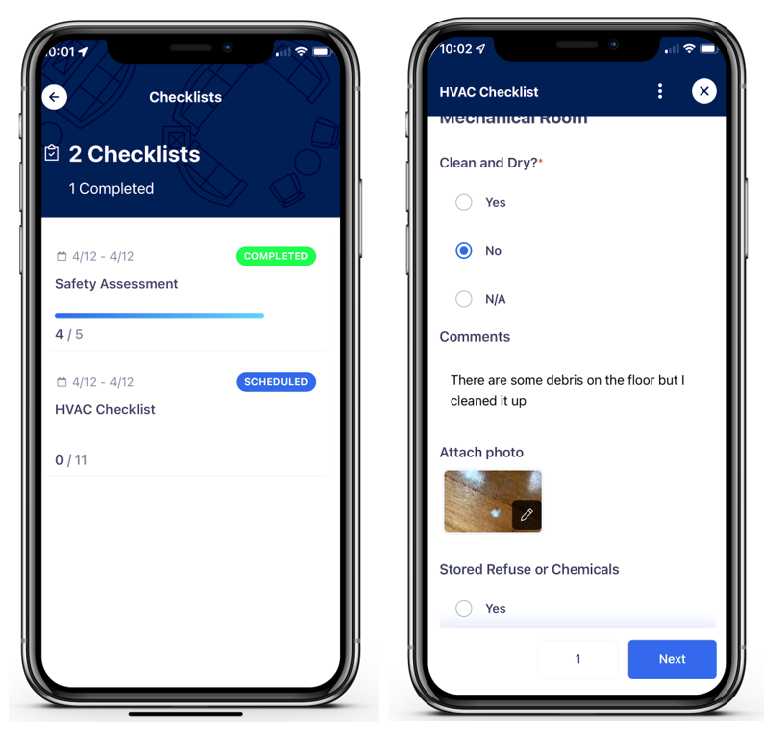
Will works through the safety assessment questions. All questions that have a red asterisk must be completed. In the right screen above, you can see that the second question, "Is the floor in good condition?" is not a mandatory question. If Will opts to skip this question, OnSite will remind him that it is incomplete when he submits the checklist.
When Will comes to the last question, he taps Submit. OnSite checks that all mandatory questions are complete, and alerts him to unanswered optional questions, offering the opportunity to return to the unanswered optional questions. Will completed 4 out of 5 questions, as one question was optional (left screen, below).
Once Will submits the safety checklist, the next checklist, an HVAC checklist, becomes active and he can work through it.
Completing Follow-up Actions
Checklists can be designed so that they generate follow-up questions or actions based on your response to a question. For example, since Will answered No to the "Clean and Dry?" question in the HVAC checklist, the checklist presented a Comments field and the ability to attach a photo so that he could provide more details to the question.
Conditions found while completing the checklist might warrant follow-up work. Below, Will has responded that an item failed; the checklist then offered fields for entering comments and the ability to generate a work request to solve the problem (left image). OnSite completes the work request fields with values from the checklist, which Will can edit as necessary (middle image). Will completes the Problem Type field and optionally assigns the work request to himself. Once OnSite generates the work request, it displays the generated work request number in the checklist (right image), which will can tap on to review its details. Since a work request was generated for the "Fail" response, Will cannot change this response later in the process (right image).

Completing the Checklist
Auto-Saving an In-Progress Checklist
After Will responds to at least one question, the checklist automatically saves. Since the checklist is auto-saved, Will can switch to another task without finishing the checklist and then return to it later.
When Will returns to the checklist, he can change answers he previously entered (unless he generated a work request based on a response).
Complete a Checklist
When all mandatory questions require no further edits, OnSite presents the checklist's Submit button.
Will taps "Submit" and if he has answered all required questions, the checklist status changes to Completed and he can no longer edit the responses.
If another checklist is associated with this request, the system immediately loads it. The checklist designer will have ordered the checklists in the appropriate order for execution. Will can now work through the subsequent checklist and click Submit when done.
Optionally, if OnSite lists all checklists to be executed in any order, Will can choose the next checklist to complete.
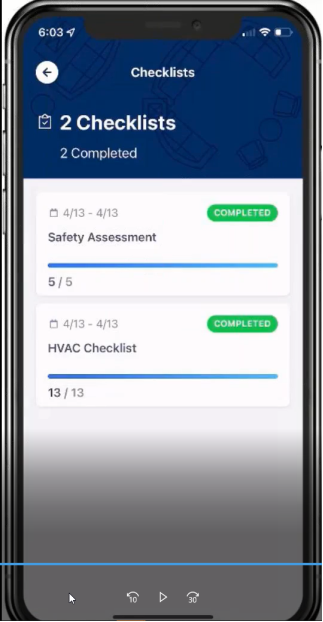
When Will has completed both checklists, the Checklists screen lists them as completed (left screen) and Will can return to the work request. N
Edit a Checklist Rejected by a Supervisor
Your site may require supervisors to review and verify checklist answers. Upon review, a supervisor might send a checklist back to you for clarification. For example, you might need to elaborate on a comment, provide more photos, or change a response because an issue has been addressed. When the supervisor rejects the checklist, they enter a comment, which is recorded in the Work Request History screen of the work request. As a craftsperson, you can review the Work Request History section to find out why the request was rejected and what must be fixed.
Once the supervisor issues the work request again, you can see it in OnSite and work on it again.