Assets / Enterprise Assets / Project Proposal Console
Adding or Deleting Individual Assets
As the proposed project progresses, you can add individual assets that are required, or can edit information for the individual assets that are already part of the project. You can add proposed furniture or equipment assets, or assets that already exist in your inventory to the project. These are assets that were not added as part of the Create Requirements action that added equipment and furniture that existed on the locations you selected for the project. You can use the Period 1 through Period 12 fields to document the projected individual assets you will require for these forecast periods.
When adding new assets, you do not add a standard. You can add the standard when you copy the proposed asset into inventory.
To add a proposed individual asset that does not yet exist in your inventory:
- From the Asset Console for Proposed Projects, select a single project on the Select Project tab.
- Select the Asset Requirements tab.
- In the List of Required Individual Assets pane, click Add .
The Add Required Individual Asset form appears.
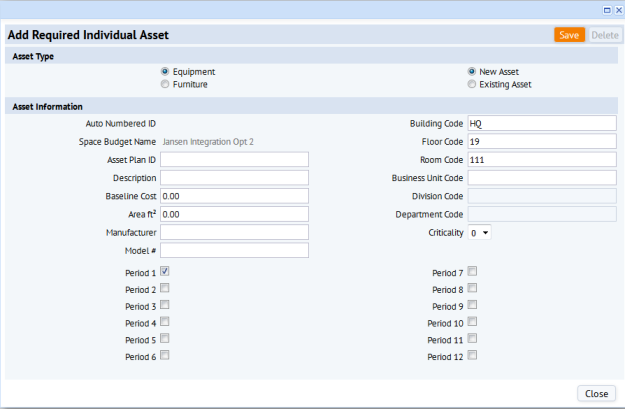
- Do one of the following:
- To add an equipment asset, keep the Asset Type selection as Equipment.
- To add a furniture asset, change the Asset Type selection to Furniture.
- Keep the selection to New Asset.
- Enter or edit the following information:
Asset Plan ID. The Auto Numbered ID is the primary key that the system automatically assigns when you save the record, but the Asset Plan ID helps you identify the asset. If you eventually add the add the asset to inventory, the Asset Plan ID becomes the Equipment Code or Furniture Code for the asset. See Copying data for equipment or furniture added as a requirement
Space Requirement. The system fills in the name of the space requirement for the project you have selected.
Building Code/ Floor Code / Room Code. Select the proposed location for the asset.
Business Unit, Division, or Department. Select the organizational unit this asset is assigned to.
Criticality. Select a number from 1 to 9 to signify the importance of this asset to your organization's mission.
Baseline Cost. Enter the cost you estimate for this asset.
Area ft2. For equipment only, enter your estimate of the area this equipment needs.
Depth and Width : For furniture only, enter the dimensions for the furniture,.
Manufacturer. For both equipment and furniture, enter the name of the manufacturer. This information is useful when its time to order the proposed asset.
Model #. For equipment only, enter the model number.
Catalog #. For furniture only, enter the catalog number.
Period fields. Check the Period fields for which this asset will apply.
- Click Save.
To add an individual asset from existing inventory:
- From the Asset Console for Proposed Projects, select a single project on the Select Project tab.
- Select the Asset Requirements tab.
- In the List of Required Individual Assets pane, click Add .
The Add Required Individual Asset form appears.
- For the Asset Type, select either Equipment or Furniture,
- Select the Existing Asset option button.
The form refreshes to reflect your selections.
- Mouse over the Equipment or Furniture fields, and click the ellipsis to access the Select Values list. This list shows your inventory of assets. For furniture you are selecting records from the Tagged Furniture table. For equipment, you are selecting from the Equipment table.
- From the Select Values list, select the furniture or equipment asset you want to add to the requirements.
The Add Required Individual Asset form is filled in with information for the asset. If the information is coming from a standard associated with the asset, you cannot change it. Otherwise, you can.
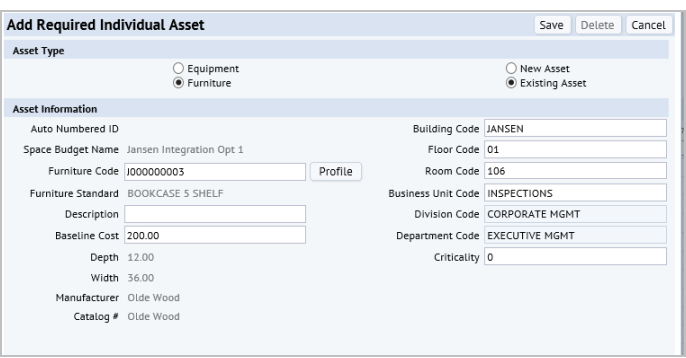
The following shows the form for a furniture asset. The read-only fields are coming from the standard.
Baseline Cost. For equipment, the application enters the Purchase Price from the Equipment or Furniture table. Otherwise, it enters the Standard Price from the Equipment Standard or Furniture Standard table. You can manually edit this value as needed.
Area ft 2 for equipment comes from the Standard Area entered for the equipment standard.
Depth and Width: For Furniture, the Depth and Width are taken from the furniture standard.
 .
. - After selecting the asset, to review the information for the asset, click the Profile button next to the Furniture Code or Equipment Code field.
- The Profile shows you the data entered for the asset. or example, the Purchase Prices is copied to the Baseline Cost.
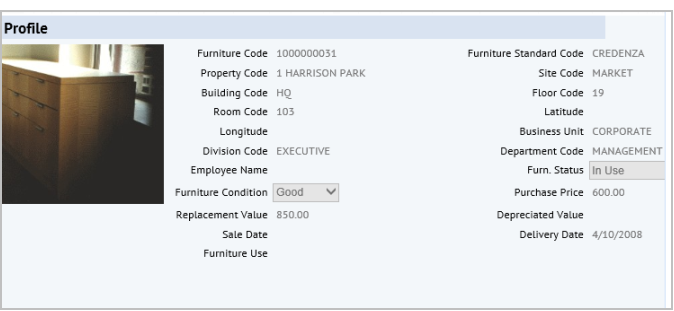
- Change data as needed. For example, you can change the Baseline Cost to reflect your current estimates, or you can change the location of the item.
- Click Save.
Individual assets are entered automatically for equipment that does not have an equipment standard when the Create Requirements action runs the workflow rule to create asset requirements, or you can manually enter an individual asset. As your planning progresses, if you decide that an individual asset is no longer needed, you can delete it. You can also edit data as new information becomes available.
To delete an individual asset:
- From the Asset Console for Proposed Projects, select a project on the Select Project tab.
- Select the Asset Requirements tab.
- In the List of Required Individual Assets, click on an asset in the grid.
-
The Edit Individual Asset form appears.
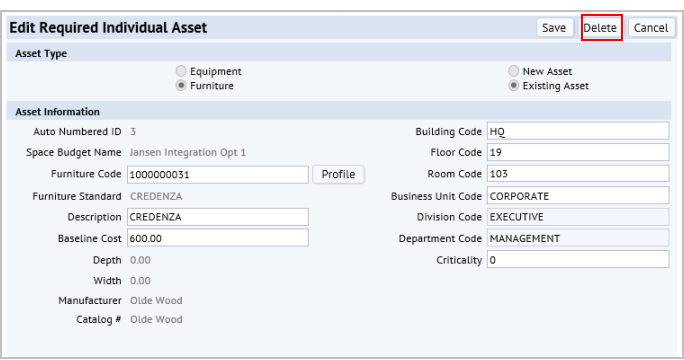
- Do one of the following:
- Make edits to the data and click Save.
- To delete, the asset, click Delete.
After you have added individual asset, you can add an action item for it. You can add an action for an individual asset:
- From the List of Required Individual Assets, click the wrench button.
The popup form appears.
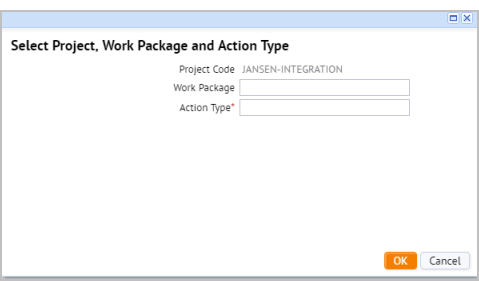
- Select the action type from the list, and optionally, select a work package. Work packages are helpful for organizing actions, and sending them out for bid. They are also required in order to have an action included in a PowerPoint export.
- Click OK.
The form appears for adding the details for the action.
For information on the data you can enter, see Managing Actions for Project Work Packages.
- Click Save on the Profile form for the action.