Archibus SaaS / Maintenance / Corrective Maintenance / BIM Viewer
Maintenance / Corrective Maintenance / Supervisor / BIM Viewer
Assets / Assets / Asset Manager / BIM Viewer
Assets / Enterprise Assets / Facility Asset Manager / BIM Viewer
Control the Display of the Model
Since BIM models represent an entire building and model many types of building components, the models have a wealth of information. In order to obtain the information you need, you will find that you need to focus the model on certain elements by zooming, panning, hiding information, and so on.
The BIM Viewer provides a series of commands for controlling the display of the model. Since the BIM Viewer is built on Autodesk Forge, the BIM Viewer offers the same display commands as found in Autodesk products. For these tools, this topic lists a few Autodesk help topics and videos that you can consult for further information. You can also search in the Autodesk documentation and the Autodesk YouTube video library.
In addition to the Autodesk tools, you can control the display using the Toggle Ghosting and Toggle Room Visibility commands, located in the BIM Viewer toolbar.
This topic has the following sections:
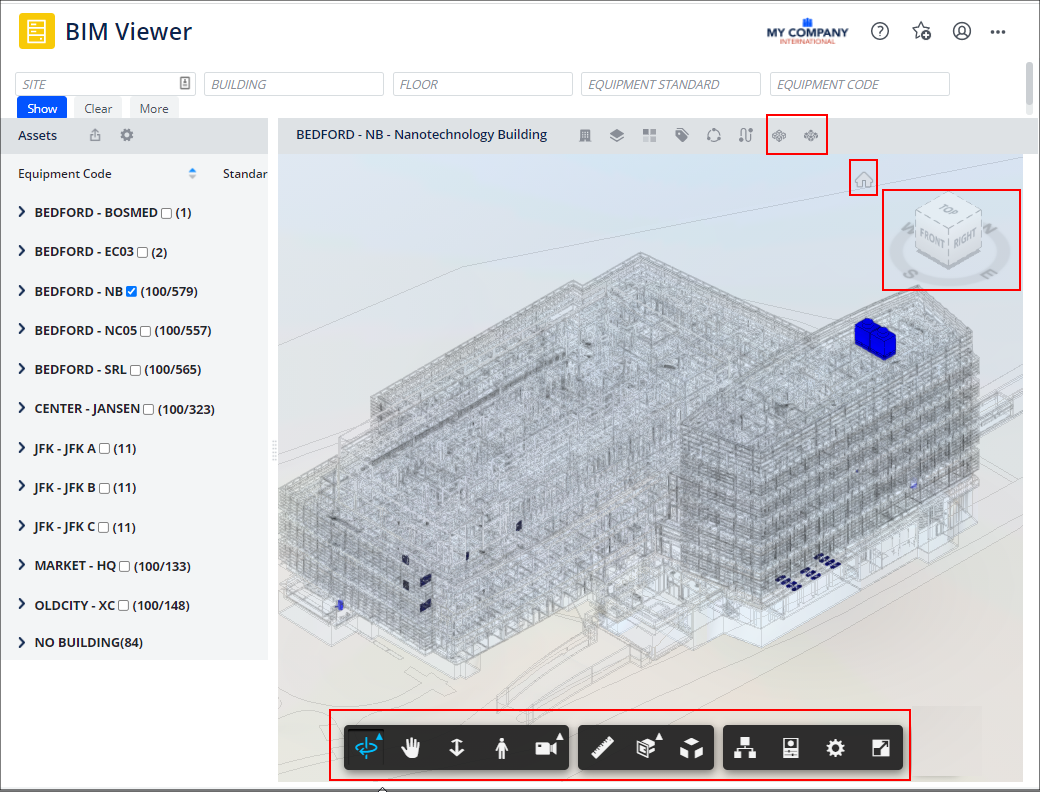
View Cube
The View Cube is located in the upper right corner of the viewer and helps you orient your view of the model. The View Cube has two roles:
-
control the orientation of the model. You can drag or click on the faces, edges, or corners of the View Cube to orient the display to the corresponding view. For example, you can click on the front of the View Cube, and the viewer displays the front view of the model.
-
indicate the current orientation of the model by turning to reflect the current view direction as you adjust the display using other tools.
Right-click on the view cube to access a menu for controlling its behavior.
For information, see:
-
https://www.youtube.com/watch?v=UlUssM353Rw, from 1:07 to 2:15
Home Button
After using the view cube or the below display commands, use the Home button, located in the upper right corner of the viewer, to return the display to the default zoom and orbit.
Forge Toolbar
The Forge toolbar, located at the bottom of the viewer, has several icons for commands that control the view from a camera into the model.
Click on a command icon to activate it; the icon will display in blue. For example, if the Pan command is active and displays in blue, when you move the mouse you will be panning the model.
As you select commands on the toolbar, the toolbar will update with new icons or prompts to work with the command you selected. For example, the Measure command adds a "Done" command icon.
Since the BIM Viewer is built on Autodesk Forge, it uses the same toolbar as Autodesk products. The below table provides a quick summary of the toolbar commands found in the BIM Viewer. For detailed descriptions of controlling the display using the toolbar, see the following Autodesk documentation:
You may also wish to consult these demonstration videos:
| Icon | Name | Description |
|---|---|---|
|
|
First Person |
Navigate through a model as if you were actually inside the model. See this Autodesk topic, which includes a walk-through video: https://knowledge.autodesk.com/search-result/caas/video/youtube/lesson/156858-courseId-100618.html |
|
|
Orbit |
Rotate and tilt the model as needed change viewing angle. |
|
|
Pan | Mouse drag over the model to move it. |
|
|
Zoom | Control the area of the magnification. You can also zoom the model using the mouse wheel. |
|
|
Camera Interactions |
Presents a pop-up set of icons for controlling the camera. The options are:
Once you select one of these options, the toolbar displays the selected icon. |
|
|
Measure | Use this tool for measuring the distance between two points on the surface of a model. You are prompted to select the points and angle. Click "Done" in the toolbar to end the command. |
|
|
Section Analysis |
Provides a pop-up set of icons for the type of sectioning you want to use.
|
|
|
Explode Model | See the individual parts that make up the model |
|
|
Model Browser |
Presents a pop-up list of items in the model so that you can examine them. Search for an item using the filter, or locate it in the list. Select the item from the list, and the model zooms in to display it. For example, search for "wall" and then choose from the resulting list a specific wall to examine. |
|
|
Properties | Select an item in the model and then use the Properties command to view its properties, such as its dimensions. |
|
|
Settings | Control how the model appears in the browser, such as background colors and lighting. For details, see this Autodesk topic: https://knowledge.autodesk.com/support/bim-360/learn-explore/caas/CloudHelp/cloudhelp/ENU/BIM-360Team/files/GUID-A65B9869-0F53-4A6E-95E2-DE6FE4617B96-htm.html |
|
|
Full Screen |
Sets the Viewer to full screen view. The BIM Viewer will take up your full area of your screen display and hides the Navigator and Assets panel. Press Esc or click the Full Screen toggle option to exit Full Screen view. |
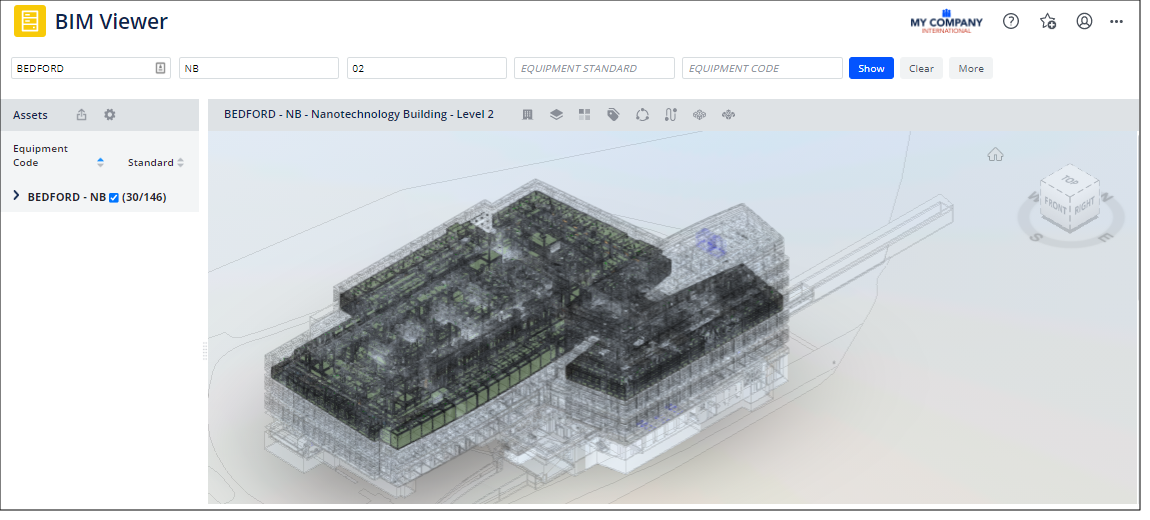
Toggle Ghosting (Translucent mode)
So that you can more clearly see your assets or selected floor, you may wish to set the viewer to display the other components of the model in a translucent mode. This is also known as "ghosted" mode. This feature lets you focus on the selection at hand while seeing its overall location within the model.
For example, this image shows Level 2 of building NB; Level 2 is the focus and the rest of the building is in ghosted mode. With ghosted mode, you can see Level 2 in terms of the overall building.
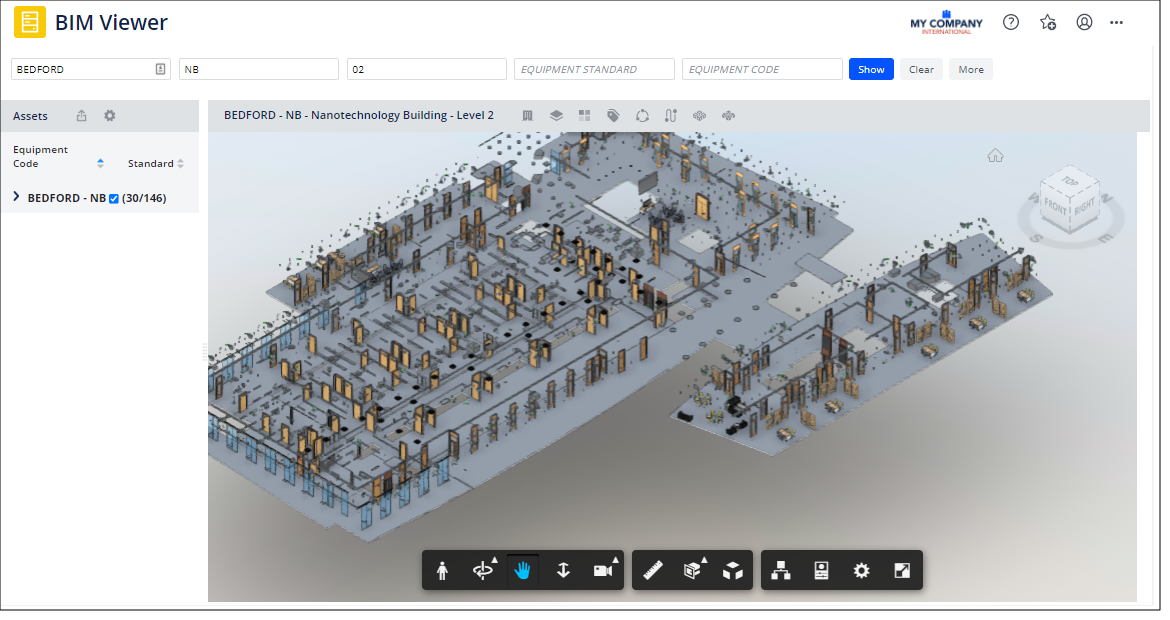
Turning ghosting off hides the other components of the building. For example, this image shows Level 2 of building NB with ghosted mode turned off.

To toggle ghosted mode on and off, use the Toggle Ghosting button on the toolbar.

Toggle Room Visibility
Similarly, you may want to view the model with or without the walls, ceilings, and other components that compose individual rooms. In the above two images illustrating ghosting, the room components are visible for NB-02. Turning off room visibility produces the following result:
To toggle room visibility on and off, use the Toggle Room Visibility button on the toolbar.
