Space / Space Planning / Space Planner / Space & Portfolio Planning Console / Stack Plan Tab
Real Property / Advanced Forecasting / Advanced Portfolio Forecasting / Space & Portfolio Planning Console / Stack Plan Tab
Adding New Allocations to the Stack Plan
If you are working with space requirements, the system will create allocations on the stack plan based on your space requirements. See Add Space Requirements to a Portfolio Scenario.
In addition to generating allocations through space requirements, you can create new allocations while working with the stack plan. For example, you might realize that you need additional allocations that are not documented in the space requirements. You can create these allocations directly in the stack plan.
Procedure
- Open the Space & Portfolio Planning Console, select a scenario, move to the Stack Plan tab, and display the stack plan for the desired building
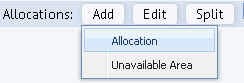
- On the stack plan, choose the "Allocations: Add" button and then choose "Allocation" from the resulting menu.
- The system presents the Add Allocated Area form so that you can specify the properties of the new allocation.

- Complete the form with these options:
| Option |
Explanation
|
|---|---|
| Allocation Name |
This is the text that will appear on the stack element's label. If you are creating an allocation for an organizational unit that already exists (a business unit, division, or department), you can enter this value for the Group Name. This way, you will easily be able to locate all stack elements for this organizational unit by examining their labels. This is the case in the above image. You can also enter free-form text in this field. For example, you may want to designate the allocation in a specific way, such as “Jim's Department.” Or, you may be allocating space to a new organizational group that does not yet exist and does not have an official name. For example, you could enter "future translation department" when planning for an international expansion. |
| Description | Enter a description of the allocation and why you are creating it. |
| Event Name | Enter a name for this event. This is the name that will appear in the Events pane |
|
Building / Floor |
Enter the building and floor to which you are adding the allocation. |
| Business Unit Division Department |
Depending on the level at which the scenario is organized, the form will include these fields so that you can specify the allocation's organizational unit. Note that one of the organization fields -- either Business Unit or Division Code-- is required, depending on the scenario level. It is not necessary that you complete the entire organizational hierarchy. This enables you to enter in a new allocation that may correspond to an intended future division, but one that's not part of the current background data. |
| Group Function | If your scenario is at the functional group level, the form will additionally offer this field. Complete this field with the name of the functional group represented by this allocation. |
| Date Start/ Date End |
The Date Start field will default to the As Of date, but you can change it as desired. If this floor is leased ( You can leave End Date blank for indefinite occupancy of owned space. For temporarily allocated space, such as temporary space needed for a project, set the End Date. |
| Highlight Pattern |
This option controls the color by which the system will display this allocation on the stack plan. By default, the system uses the color of the Acad Highlight Pattern field of the organization (as specified in the Business Units, Divisions, or Departments table); if the Acad Highlight Pattern field does not have a value, the system generates a color for the allocation. For functional groups, the system generates a color. If you want to use the Acad Highlight Pattern color or a system-generated color, do not edit this option. This is the case in the above form. If you want to set the color of an allocation element, click on this option's Set Color button. The system displays a form from which you can choose a color. Choose a color and the system completes the Highlight Pattern field with this color's AutoCAD color number and displays a swatch of the color on the form. On the stack plan, the system creates an allocation with this color. If you want this color to apply to all of the scenario's allocations that have the same organization, select the check box. When creating new allocations, a best practice is to skip this field. Once the system generates the allocation, if you don't like the color you can edit it. See Editing an Allocation on a Stack Plan. |
| % of Floor | You can have the system calculate the area by entering this field and choosing Calculate Area. For example, if you know that you want to assign 10 percent of the floor to an allocation, you can enter "10" in this field and choose Calculate Area. The system will calculate the area, and display it in the Area field. |
|
Employee Headcount/ Employees per Seat |
If you have defined the floor's Standard Area per Employee, you can use Employee Headcount and the Employees per Seat fields to calculate the area based on employee headcount. For example, suppose you know that you need space for 10 employees and that each employee takes one seat. In this case, you can set Employee Headcount to 10 and Employees per Seat to 1 and then choose the Calculate Area button. The system will calculate the area as: For example, in the above image, each employee is allotted 80 square feet, so the system calculated the area required for 5 employees. You can set the floor's Standard Area per Employee value from the Floor Details and Building Details forms (accessed by clicking on these entries in the Allocated Buildings pane). |
| Area |
If you know the amount of area for this allocation, you can type in the amount in this field. If you are working with the above employee and percentage options, complete those options and choose "Calculate Area." The system will calculate the area and present the value in this field. |
Click Save to process the Add Allocated Area form. The system:
- adds the allocation to the floor's stack plan.
- creates a record in the Groups table for this allocation.
- updates the Events pane to include this new allocation event
- updates the Locations panel in order to recalculate the Utilization statistics.