Archibus SaaS / Maintenance / Background Data - Labor / Manage Craftsperson Shifts
Maintenance / Corrective Maintenance / Background Data / Manage Craftsperson Shifts
Maintenance / Preventive Maintenance / Background Data - Maintenance / Manage Craftsperson Shifts
Define Shifts and Assign Shifts to Craftspersons
Organizations will often have multiple craftspersons that work the same hours. Use the Manage Craftsperson Shifts task, located at the above paths, to:
- define the hours of standard shifts. Shifts can be permanent or for a specific time period.
- review the list of craftspersons assigned to a particular shift for a particular time period
- assign or unassign a standard shift to multiple craftspersons at one time
The Manage Craftsperson Shifts task(ab-bldgops-cf-shift.axvw) presents a list of shifts on the left, and the assigned craftspersons for each shift on the right.
Review craftspersons assigned to a shift
- Select a shift in the left panel.
- Select the Craftspersons tab.
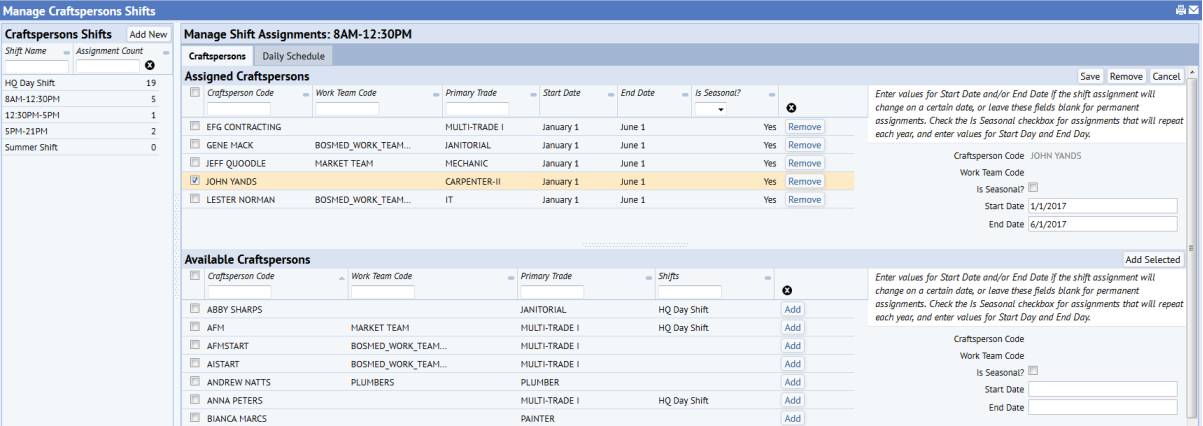
- In the Assigned Craftspersons panel, the view presents all craftspersons assigned to this shift during this time period.
- Select a specific craftsperson in the Assigned Craftspersons panel, and the right panels show the details for this craftsperson's shift. For example, in the above image you can see the details for John Yands. If you select multiple craftspersons, the panel displays common values and displays <varies> for values that are not the same for the selected group.
Assign shifts to craftspersons
Follow the below steps to apply a shift to multiple craftspersons at one time, or to individual craftspersons. Note that you can also apply shifts to individual craftspersons using the Define Daily Schedules tab of the Define Craftspersons task.
- Select a shift in the left panel and select the Craftspersons tab.
- To add more craftspersons to this shift, locate them in the Available Craftspersons pane, select their check boxes, and choose the Add Selected button at the top of the pane. You can also assign craftspersons individually by choosing their Add button. Specify the time frame by setting the options in the right panel:
- If you want to make a seasonal assignments (assignments that repeat each year during specified time frame) choose the Is Seasonal? check box and complete the Start Day and End Day fields. For example, suppose you require extra craftspersons each summer for grounds improvement projects. You would complete "Is Seasonal?" and then enter the date range as May 1 to October 1. You do not enter the specific year for the date range, as this assignment repeats each year.
- For temporary work with a known date range, complete Start Date and End Date.
- For a permanent assignment, leave End Date empty.
- The Assigned Craftspersons pane shows any craftsperson assigned to this shift. Use a craftsperson's Remove button to unassign. Or, select the check boxes of several craftspersons and choose the Remove button at the top of the panel.
- As you add and remove craftspersons from the shift, the view updates the Assigned Craftspersons and Available Craftspersons panes with the changes.
Define shifts
From the Manage Craftsperson Shifts task, you can also define standard shifts, such as:
- a standard Monday through Friday day shift
- a weekend shift
- a part-time shift
- a full-time evening shift
You can use the rate feature to specify if overtime rates apply to certain hours of the shift. For example, in the below image, you can see that HQ Day Shift 1 is Monday through Friday, 8:00 to 5:00; if a craftsperson works hours outside of this time frame, overtime and double-time rates apply.
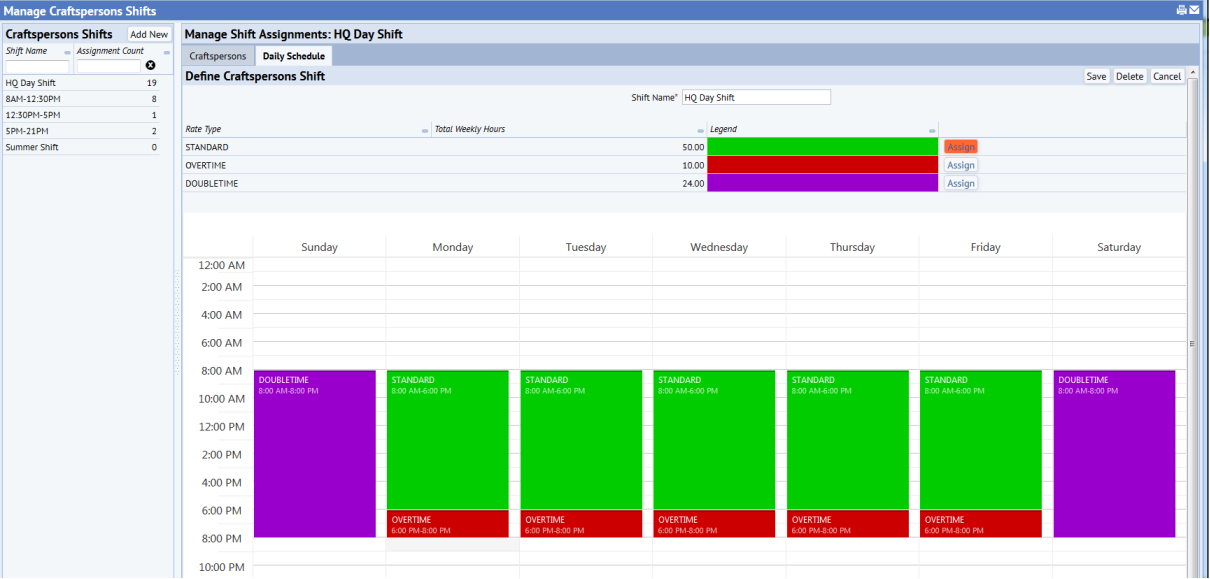
- Choose the Add New button, located in the Craftsperson Shifts pane.
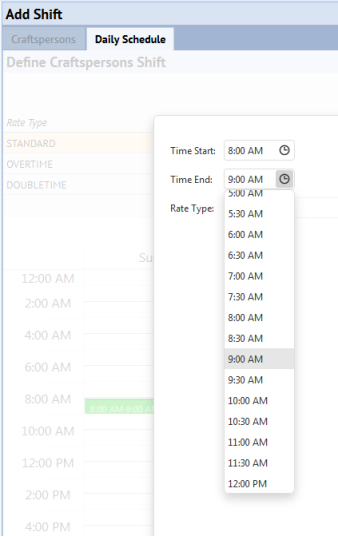
- In the Define Craftsperson Shift form (shown above), complete Schedule Name with a unique value to identify this shift, such as Day Shift A, Night Shift A, Weekend Shift, and so on.
- For the for a desired rate (standard, overtime, double-time) to which you want to assign a time block, click on the Assign button.
- Double-click on a time block to which this rate applies. The system presents an edit form with the time frame of the block you picked
- You can use the edit form to change the time slot by changing Time Start and Time End.
- As another option, you can confirm the time slot that the form presents and process the form. Next, in the form, stretch the time block to represent the desired time. For example, you might have first completed a 60-minute shift from 8:00 to 9:00. You can now select this block and stretch it to fill the time blocks of the entire day.
- Time blocks can only exist in a single day; for example, you cannot start a time block on Monday and extend it to Tuesday. If a craftsperson is working from 8:00 PM Monday to 6:00 AM Tuesday, then you must create two separate time blocks.
- Repeat for any time blocks that require other rates.
- Click Save in the upper right corner when through.
Editing a shift's time blocks
You can manipulate a shift's time blocks by moving them to different days or times or resizing them.
To move a time block:
- Click on the time block.
- Drag it higher or lower in the column for the current day, or move it side to side to move it to another day.
To resize a time block:
Suppose you have created a time block and then realize that the job will take longer.
- Click on the top edge or bottom edge of the block.
- Move up or down with the mouse to drag the time block to a new size.
To edit or delete a time block:
- Click on it.
- The system presents a pop-up form detailing the rate and time period for the time block.
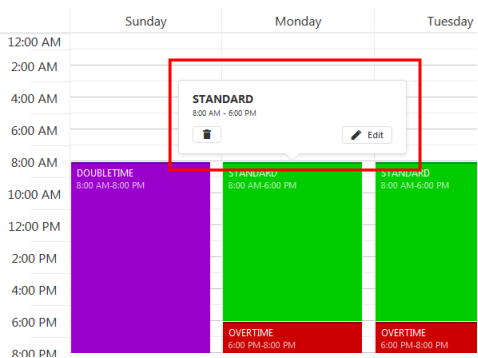
- To delete the block, select the trash can button.
- To edit the block, select the Edit button and complete the resulting form.