Archibus Web Central
Setting the Locale and Language
To accommodate users from around the world, Archibus multiple locales and languages .
Set the Locale
The locale controls the following elements in Archibus:
-
date format
-
currency
-
language
-
country
From Web Central's My Profile form, edit the Locale option and select a locale from the drop-down list. The list includes locales that are associated with your server. For information, see Enabling Languages and Locales (System Management Help).
Note that the My Profile command's Locale setting applies only to Web Central. Set the locale for other Archibus components:
| Program | Set the Locale |
|---|---|
| Web Central and Workplace | My Profile command, Locale option |
| Smart Client | Set Up / Preferences command, Locale option |
| Archibus mobile apps | Set the default language of your mobile device |
| OnSite | Set the default language of your mobile device |
Out-of-the-box Language Support
Without customization, Archibus can appear in these languages if your locale is set to these languages:
-
French
-
Italian
-
German
-
Spanish
-
Dutch
-
Chinese
-
Japanese
Note: Japanese is not yet available for the Smart Client Extensions for AutoCAD and Revit.
Additionally, if you set the French, Italian, German, or Spanish locale, you will receive a translated version of Archibus Help.
Administrators can localize the Archibus user interface into other languages using the Archibus Localization Kit (System Management Help).
Temporarily Work in Another Language
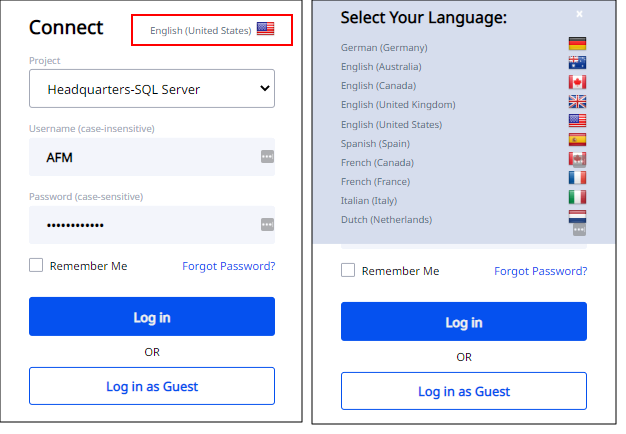
If you do not want to change the locale, but want to temporarily view another language when you sign in, you can choose another language on the Connect sigh-in page. Click on the current language in the upper-right corner and you receive the Select Your Language form, which lists those locales associated with your server. The user interface elements of WebCentral will display in the selected language for this session.
See Also
Changing your Preferences and Password (My Profile command)
Localization Coordinator: Overview (System Management Help)
Enabling Languages and Locales (System Management Help)