Archibus SaaS / Space / Move Coordinator / Move Console
Space / Moves / Move Coordinator / Move Console
Explore the Move Console
The Move Console summarizes your individual moves and group moves in a move list, as well as presents the details of each move, and offers functions for managing the move through its various states.
This topic reviews the following features of the Move Console:

Request a move
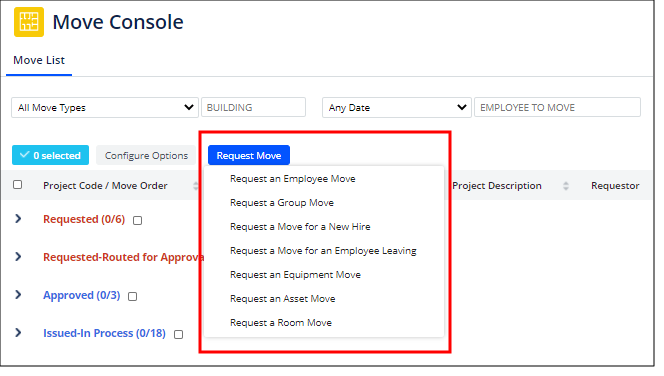
Although moves are typically requested by staff members using Workplace or the tasks of the Move Requestor process, move coordinators and others working with the Move Console may also need to request moves. The Request Move button offers a menu of the same move commands found in the Move Requestor process. For details, see Request an Individual Move and Request a Group Move.

Control data displayed on Move Console
With the Configure Options button, you can control:
-
the fields that appear in the Move Console
-
whether or not the Move Console displays closed and completed move orders. When you opt to include these move orders, they appears in their own groupings at the bottom of the list of moves.
Expand and contract moves lists
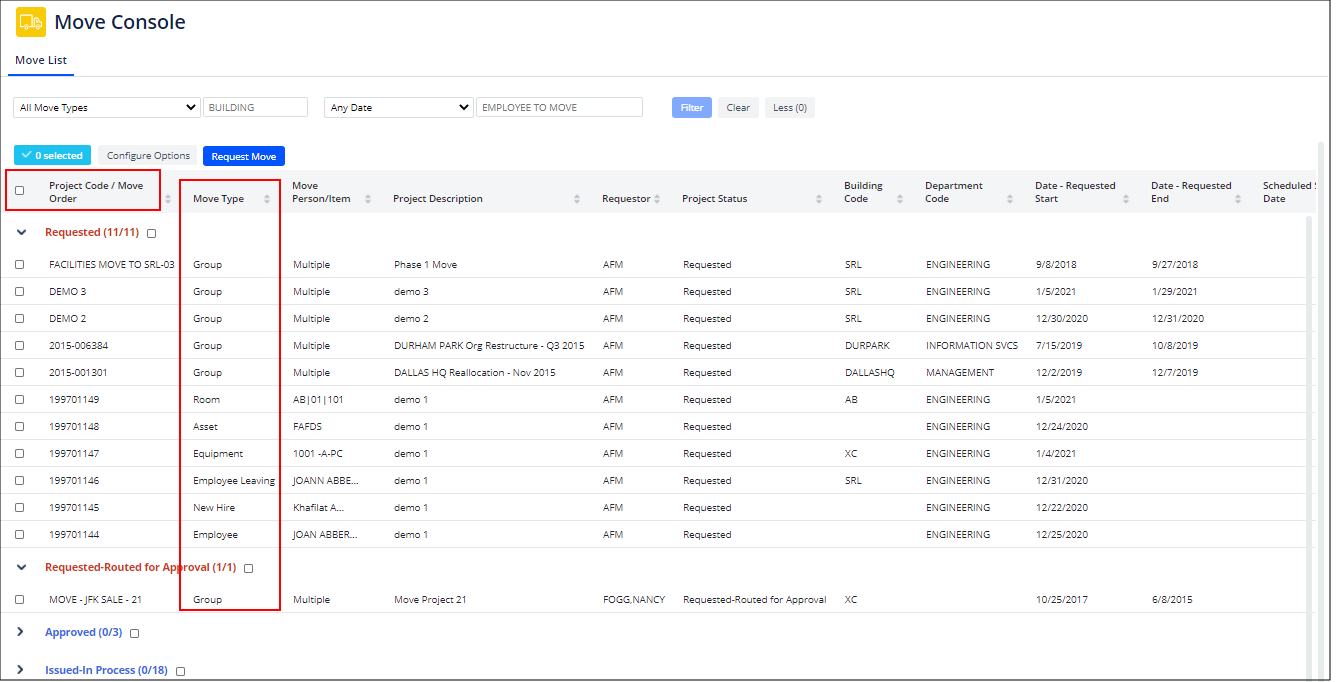
The Move Console groups moves according to move status, with a count of each move status in the status header. Click the header to expand the list. For example, in the above image, the Console expands the top two lists, but presents only the summary header for remaining statuses. As you work with moves and they change status, the Move Console updates the header bands with new counts and lists the move in the appropriate category based on status. For more information, see Console Views: Grouping by a Category.
Search for a move
Use the Move Console's filter to search for moves on several criteria.
Select multiple moves to act on
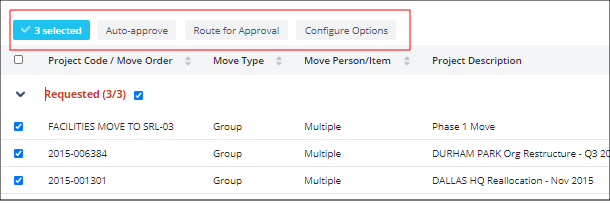
When you select a set of moves for which the same action is applicable, the Move Console presents buttons for the appropriate actions for this set of moves at the top of the move list. For example, in the below image, the user has selected the header check box to select all requested moves, and can now use the buttons at the top of the list to approve all selected moves with one action.

Note that the Move Console displays buttons for the "major" actions such as Approve and Issue. It does not include the "minor" status changes such as "Requested-Rejected" or "Approved-Cancelled". To make these types of refined status changes, you must edit the Move Status field (individual moves) or Project Status field (group moves).
If you select multiple moves and find that the Move Console does not present the button for the action that you want to take, review the list of selected moves and remove moves from the selection set for which the desired action does not apply. For example, if you select a move in the Requested band and also moves in the Completed-Verified band, the Close button will not be available because you cannot close a requested move.
Select one move to review or act on (Review Details tab)
Once you expand a header and show the list of moves, you can select a move to review its details and process it through the move cycle.
To see the details of a move, in the move list click on the move's Project Code / Move Order value (the leftmost value).
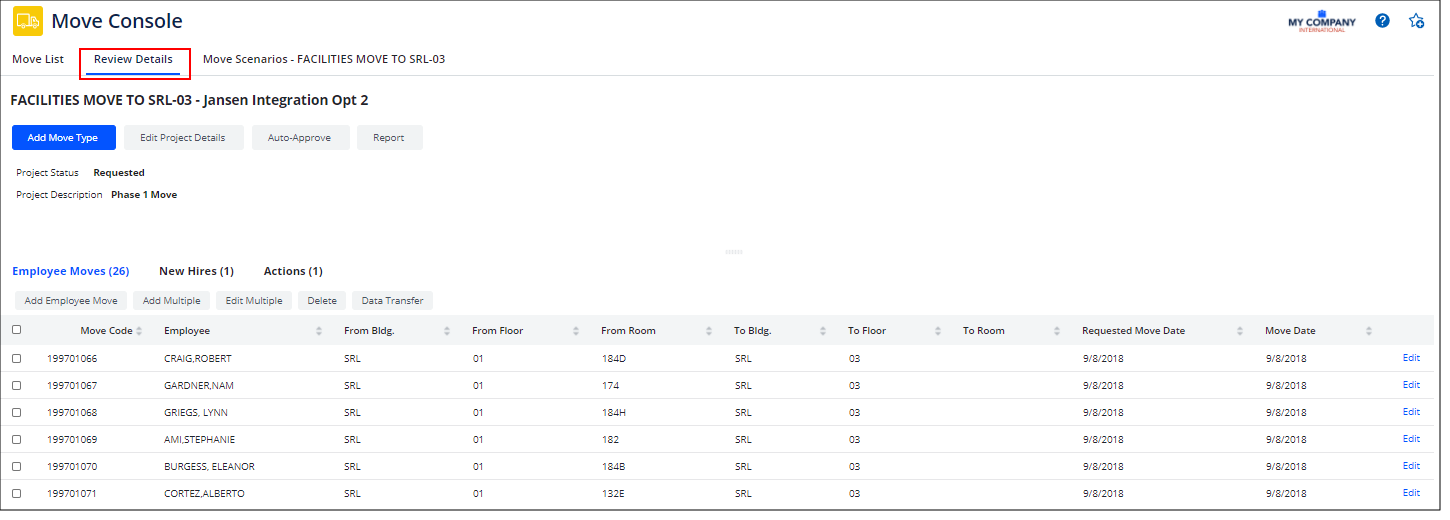
The Move Console moves you to the Review Details tab, shown below. From here, you can edit data, process the move, add more moves , and so on. The Review Details tab presents a tab for each type of move order assigned to the group move, as well as an Actions tab. The group move order in the below image has employee moves, new hire moves, and assigned actions.
To move back to the list of all moves, click on he Move List tab.

Move scenarios
Note that if you select an employee or team move from the move list, the Move Scenarios tab is activated so that you can create or work with move scenarios. From here, you can create multiple scenarios and then compare the results. After you select the scenario that best suits your needs, you can update the move orders' room destinations with the assignments in the selected scenario. For example, in the above image, the user has selected a move scenario from the move list. Accordingly, the Review Details tab offers the Move Scenarios tab.
Clicking on the Move Scenarios tab presents the move scenario, which includes an Edit button.

The Move Scenarios tab offers all the same features as the Move Scenario Planner process. The help system's Table of Contents lists the move scenario topics under the Move Scenario Planner book, but as a move coordinator you use these same topics; the features operate the same way regardless of which process they are accessed from.
You can also add scenarios using Edit My Group Moves or Develop Move Scenarios tasks. See Move Scenario Planner Overview.