Capital Projects / Projects / Management Console
Adding and Updating Action Items from the Management Console
From the Project Console, you can review all action items for a project before adding a new action, or you can drill down to a specific work package and add action items directly to the work package.
Having up-to-date action item information is critical to tracking projects. To facilitate managing your actions, the Management Console enables you to copy baseline costs from one project to another, to bulk update actions, and to export actions to MS Project, or import them from MS Project.
The Management Console facilitates managing action items by enabling you to: bulk update action items. For example, you can bulk update the status or completion date for multiple items at once.
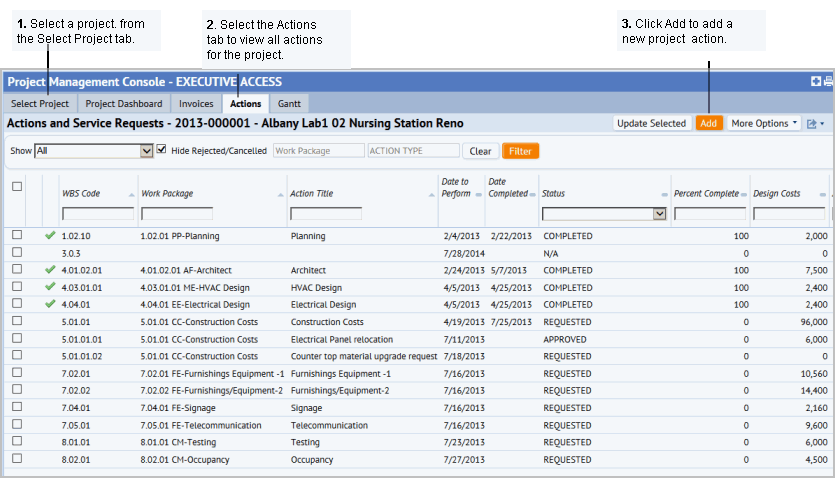
- From the Project Dashboard, select the Actions tab.
- From the Actions and Service Requests list, select the check box for the actions you want to bulk update.
- Select Update Selected.
The Update Selected Actions form appears.
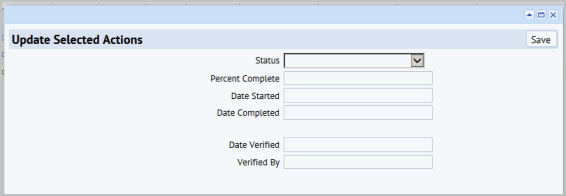
- From the Update Selected Actions screen, you can change the Status, Percent Complete. Date Started or Completed, Date Verified, or Verified By.
- Click Save,
The information is recorded for all selected actions.
You can copy the following costs for an action item:
- Action Item Baseline Cost Estimates (Capital) and Expense cost values
- into Actions Item Design Cost Estimates Capital and Expense cost values
- if and only if, the Design Costs currently equal zero.
To copy an action's baseline costs to its design costs.
- From the Project Dashboard, select the Actions tab.
- Select the check box for the Action for which you want to copy its baseline costs to its design costs.
- Click More Options, and select Copy Baseline Costs from the list.
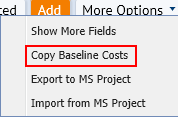
A message asks you to confirm the operation.
- Click Yes to continue.
You can import action item data from MS Project to Archibus, or you can export your data to MS Project.
- Select the Actions tab.
- Select More Options and then select Export to MS project, or Import from MS Project from the list.
To add an action item to a work package:
- From the Project Dashboard, in the Commitment Status Progress Status report, click the work package for which you want to add actions.
The Work Package Profile and Contract tab appears.
- Select the Actions tab.
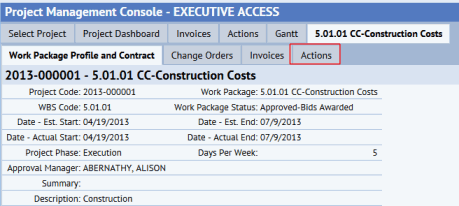
- Select Add at the top of the Actions tab. The Create Action Profile form appears.

- Select an Action Type for the action. The Action Type is a required field as it has a key role in organizing actions. When you assign an action a type, you are able to locate and monitor actions by their type. When estimating schedules and duration, you can filter by Action Type to see only those actions on the Gantt chart.
- Optionally, enter the following:
- Action Title to clearly identify the action.
- WBS Code for the action. The WBS Code is a way to order and categorize your action items. In general, actions which are performed earlier will have a lower WBS code value. If the work package has a WBS Code entered for it, this code is copied to the field. Generally, the action item's WSB code is prefixed with the WBS Code of the Work Package. For example, if the work package has a WBS Code of 2.01, the first action item to be performed for this work package will have a code of 2.01.01
- Project Phase: Select a Project Phase value, such as Design or Execution. For example, this is useful if you want to track the project at the Planning phase or Execution phase level in the Project Analysis report. Or, when adding actions to work packages using tasks for the Plan or Procure processes, you can search for work packages by the Project Phase for the project with which the work package is associated. For more information on the Project Analysis report, see the Project Analysis Report topic.
- Click Save.
The Edit Action tab appears.
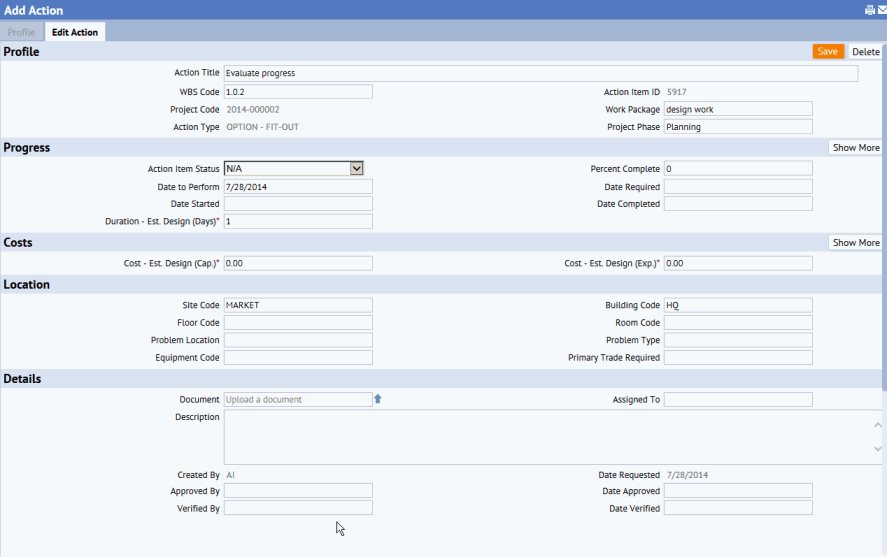
- Enter additional information as needed. For example,
- in the Costs section, enter the Cost - Est. Design to record the estimated design costs for the action.
- Or, in the Details tab, you can use the Assigned To field to assign the action item to a specific employee. These assigned task will show up in the My Open Tasks alert for the assigned user.
- In the Progress section, as work progresses, enter Action Item Status. This is a key field as you can track and manage actions by their status, and view milestone statuses (Monitor process / View Milestone Statuses). Work packages can automatically be marked as complete based on the action item Status.
- Click Save.
- After selecting a project, click the Actions tab.
This tab shows all actions for all work packages for the selected project.
- Click Add to access the Add Action form.
- Select the Action Type. This is a required field. When you assign an action a type, you can locate and manage actions by their type. For example, when estimating schedules and duration, you can filter by Action Type to see only those actions on the Gantt chart.
- Enter the following optional information:
Action Title to clearly identify the action.
WBS Code for the action. The WBS Code is a way to order and categorize your action items. In general, actions which are performed earlier will have a lower WBS code value. If the work package has a WBS Code entered for it, this code is copied to the field. Generally, the action item's WSB code is prefixed with the WBS Code of the Work Package. For example, if the work package has a WBS Code of 2.0, the first action item to be performed for this work package will have a code of 2.0.1
Work Package: Select a work package from that list. If you have not yet created the work package, you can assign it at a later time. See Adding a Work Package.
Project Phase: Select a Project Phase value, such as Design or Execution. For example, this is useful if you want to track the project at the Design phase or Execution phase level in the Project Analysis report. Or, when adding actions to work packages you can search for work packages by the Project Phase for the project with which the work package is associated. For more information on the Project Analysis report, see the Creating Management and Oversight Reports topic.
- Click Save.
The Edit Action tab appears.
- Enter additional information as needed. For example, in the Costs tab, enter estimated design costs for the action. Or, in the Details tab, you can assign the action item to a specific employee.
- Click Save.
Up-to-date action item information is important to tracking a project's progress. The Management Console includes action buttons that automatically update action status for you. For example, if you run the Sign Contract action, this automatically updates the Action Item Status for the contract. As the project progresses, you would typically update action information such as the following:
- Date Started
- Date Completed
- person-hours performed
- Action Item Status. The status is used to determine when the work package is completed, so having up-to-date action status is critical to tracking a project's progress. The Action Item Status is found in the Progress section of the Edit Action tab.
- Actual costs
To update actions:
- Access the Edit Actions form from the Project Dashboard in either of the following ways:
- Select from a list of actions for the project.
- After selecting a project, click the Actions tab.
- The list of actions for the project appears.
- Click an action to access the Edit Action form.
- Select from a list of actions for the work package.
- From the Project Dashboard, in the Commitment Status Progress Status report, click the work package for which you want to edit an action.
The Work Package Profile and Contract tab appears.
- Select the Actions tab.
The actions for the work package appear.
Click an action to access the Edit Action form.
- Select from a list of actions for the project.
- On the Edit Actions form, in the Progress section, click More to expand the form.
- Enter information, such as the Date Completed and Hours- Actual. When you enter the Date Completed, the application enters the Duration - Actual (Days.)
- In the Costs section, click Show More to expand the form.
- Enter information, such as the actual costs for this action.
- In the Location section, enter information for the location, equipment, problem type, or primary trade required.
- In the Details section, attach a document , enter approval or verification information.
- Click Save.
