Sustainability & Risk / Hazardous Materials / Review Material Inventory
SDS Geographic Drill-Down
The SDS Geographic Drill-Down is a map view with a drill-down filter that zooms into a location. The map view provides the ability to analyze risks relative to geographic locations. Color-coded, diamond-shaped markers at a site or building location display the selected aggregate information. Evacuation Radius can also be displayed as a circle depicting the radius.
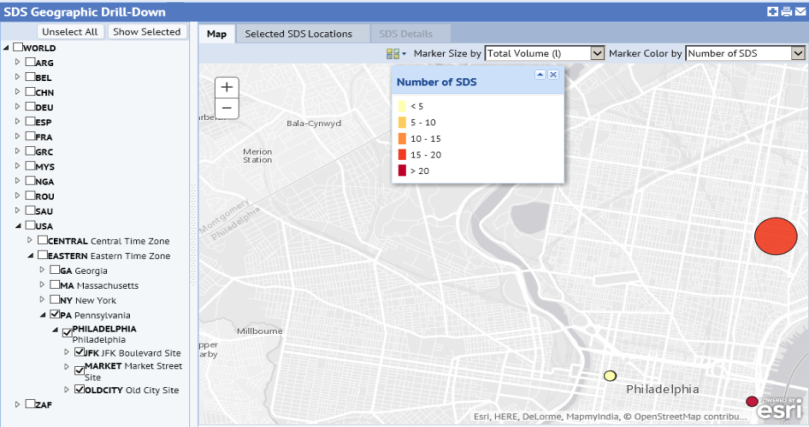
The map and drill-down list are initially zoomed out to a world view. You can expand the list from world, to country, region, state, site, down to the building level. The list displays only locations where SDSs have been assigned. Select the locations of interest by placing a check mark at any level in the drill-down list and then click Show Selected.
Note: You might need to scroll back to the top of the list to see the Show Selected button.
The map zooms to a level that includes the selected locations. The marker size and color will depict the selected aggregate information:
Marker size and color
You can make selections from the Marker Size and Marker color lists to control what is shown on the map.
Marker Size: quantities are indicated by diamond markers for all selections except evacuation radius that is shown as a circle. The marker size is a relative indication of quantity.
- Number of SDSs - The count of SDSs entered for the location. If a location does not have any SDSs entered for it, it is not shown on the map.
- Maximum Specified Evacuation Radius - If you select this option, the marker changes to a circle showing the radius entered for the SDS.
- Total Mass - The total solid mass for SDS Products calculated from the quantity entered for the location
- Total Volume - The total liquid volume for SDS Products calculated from the quantity entered for the location
Marker Color: the legend changes to reflect the type of data selected for marker color. The data are binned into color-coded groups based on minimum and maximum values represented in the selected dataset.
- Number of SDS. The count of SDSs entered for the location. If a location does not have any SDSs entered for it, it is not shown on the map.
- Maximum Specified Evacuation Radius. Locations are color-coded according to the size of the evacuation radius.
- Total Mass. Total Solid Mass for SDS Products calculated from the quantity entered for the location
- Total Volume. Total Liquid Volume for SDS Products calculated from the quantity entered for the location
- Tier II Hazard Count. The number of chemicals that are listed as hazardous for the SDSs at this location. When the Business Process Owner defines chemicals, they can also select the Tier II Hazard Classification for the chemical. You can then enter the Tier II classification when you enter constituents for the SDS. See the Define Chemicals task, and Entering the Product Ingredients (Constituents tab).
- Highest Tier II Hazard Present. Shows the highest Tier II rating entered for all SDSs at this location.
Showing the maximum evacuation radius
If you enter the maximum evacuation radius for an SDS, when you make a selection from the Marker Size list, the screen refreshes to show the radius as a circle. The size of the circle is a to-scale radius based on the measurement specified in the data. Note that you need to be at an appropriate zoom level to be able to see the evacuation radius.
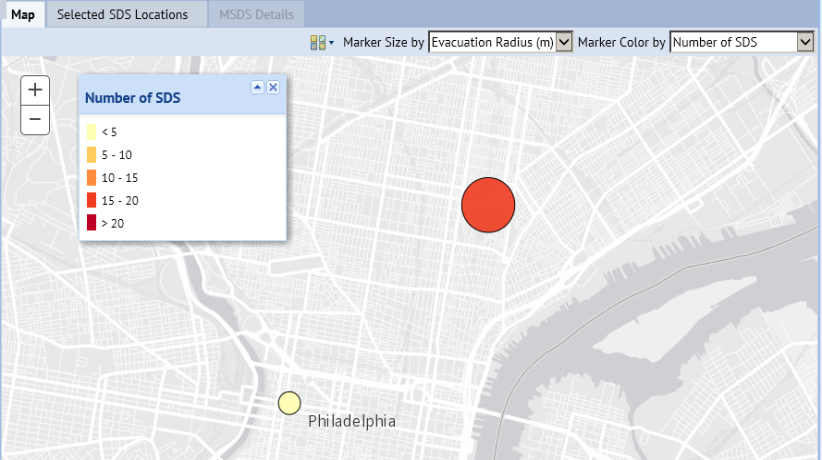
For example, you might choose Evacuation Radius in the Marker Size drop down, and Number of SDSs in the Marker Color drop down. The example below shows this selection for the PA location. The circle sizes give an indication of how large the evacuation area is, and the color shows that the JFK location has fewer that 4.6 SDSs, while Old City has between 13.8 and 18.4. If you compare this screen shot to the one above, you'll note that there is no symbol shown for the Market Street Locations (HQ). That is because no evacuation radius is specified for any location or any SDS at those locations.
You enter the evacuation radius on the Physical Properties tab when you define the SDS, or you can enter the radius on the Define SDS Location Details form when you re associating SDSs and locations. See Define SDS Locations.
For example, you might choose Evacuation Radius in the Marker Size drop down and Number of SDSs in the Marker Color drop down. The example below shows this selection for the PA location. The circle sizes give an indication of how large the evacuation area is, and the color shows that the JFK location has fewer than 5 SDSs, while Old City has more than 20. If you compare this screen shot to the one above, you'll note that there is no symbol shown for the Market Street Locations (HQ). That is because no evacuation radius is specified for any location or any SDS at those locations.
Viewing tooltip and site information for a location
Mousing-over a map marker shows the name of the location. Click on the marker and a pop-up window provides the following: Site Code, Building Code (if applicable), Building Name (if applicable), number of SDSs at that location, highest Tier II rating at that location, and maximum specified evacuation radius for SDSs at that location.
Click Show Details to see the location highlights.
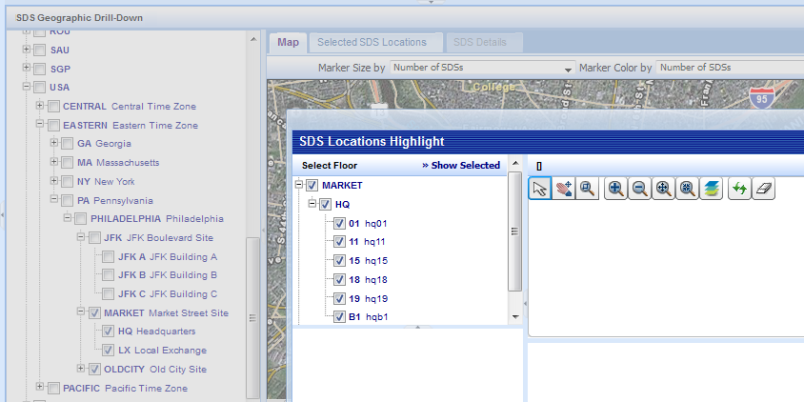
Location Highlights view
Clicking on the Show Details link in the marker's pop-up window will bring up the Material Locations Highlight view in a separate window. If the location has floor plans defined, the drill-down list in the Material Locations Highlight will be expanded to show the selection. While in this view, you are not able to perform other functions until you close the window.
Viewing location information for products
Once locations have been shown, the "Selected SDS Locations" tab will display a list of the rooms at the selected locations that have SDSs assigned to them. You can export the list of rooms to Excel or to PDF. Clicking on a room will display the assigned SDSs below the locations.
Viewing SDS details
The SDS details can be displayed in the SDS tab by clicking on the SDS record. The details are displayed in 5 sub-tabs: Identification, Document, Hazard Classification, Constituents, and Physical Properties. The topic Define Materials and Safety Data Sheets (SDS) provides a description of each of the fields displayed on these tabs.