Archibus Smart Client Extension for Revit
Using Existing Room Elements for Room Inventory
Often, facility managers receive Revit models that already have Room elements. Follow this procedure to register these Revit elements with Archibus.
One-Step Catalog
If your Rooms have a consistent numbering scheme in the “Number” parameter, you can catalog all rooms in your model in one step.
- Ensure that all levels have the Set Level Properties command to identify their Building and Floor Code. See Set Model-Level Properties Command.
- Load a view containing your Room entities.
- Invoke the Catalog command and then select to apply the command to the whole model. Archibus will catalog all of the rooms in your model in one step. See The Catalog Command.
Renumbering Rooms
To create a room inventory using your existing rooms data:
- Open Revit. Open Revit and sign in to your Archibus project (for example, log into the sample HQ project http://localhost:8080/archibus/ as user AFM or AI).
- Open Model. Open the Revit model.
- Create Revit View. Create or rename a view containing your Room elements to contain the word “Rooms”, for instance “Level 1 – Room Plan”. You can do so in the Project Browser by right-clicking on the level name and selecting the “Duplicate View” or “Rename …” command.
- Set Level Properties. Use the Set Level Properties command to associate this level with a particular Building Code and Floor Code. See Set Model-Level Properties Command.
- Number. Use the Number command to renumber any series of rooms that has the wrong room number. This step is often necessary if the model was numbered sequentially for room scheduling purposes rather than numbered by-level for way-finding purposes. See Data Numbering Command.
- Data Edit. Use the Data Edit command to number any individual rooms that have the wrong room number. Do so by entering in the Building, Floor and Room Code. You can edit other values associated with the room, but doing so is optional. See Data Editing Data Command.
- Catalog. Use the Catalog View command to catalog any rooms with existing room numbers that you did not use Number or Data Edit to correct. If you wish to catalog the entire model in one step, use the Catalog Model command. See One-Step Catalog.
Publish Enterprise Graphics. Use the Archibus / Enterprise Graphics / Publish 2D or Publish 3D commands to create a graphics index of your Revit model. You can publish view-by-view or the entire model at once. See Publish Enterprise Graphics directly from Revit.
Representing Vertical Penetrations and Service Areas
Modelling Vertical Penetrations. You can represent Vertical Penetrations, such as chase or areas open to below, as rooms. When doing so, number the room in the form HQ-17-VERT01.
Modelling Service Areas. You can represent Service Areas, such as lobby areas or mechanical closets, as rooms as well. When doing so, number the room in the form HQ-17-SERV01.
These “VERT” and “SERV” room codes have no consequence for automation, but the convention helps other people understand the room plan.
Use Edit Data to assign these to the "VERT" or "SERV" Room Category so that Archibus categorizes the area appropriately for area calculations.
Revit Notes - Creating Rooms
If you have a new model or a model without Rooms, create rooms by running:
- The Home / Wall command to draw four or more walls.
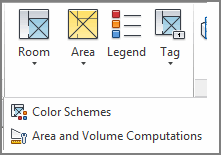
- The Home / Room command to insert a room tag within a closed set of walls.
You can use the Home / Room / Area and Volume Computations dialog to set whether Rooms go to the wall finish, center, or core. If you do change this setting in your model, you can use the Archibus Catalog command to update the areas in the database in one step.
