Archibus Smart Client
Selecting the Fields to Display
While working with a view in Smart Client, you may find that the view does not display the database fields that you require, displays fields that you do not need, or displays fields in an undesired order.
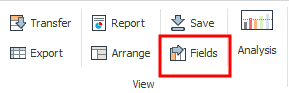
The View / Fields command controls the fields of the active view, and the order in which the view presents these fields. You can hide and display fields for any table-group in the view.
Use View / Fields command to:
- set the fields that a view displays
- set the order in which the view displays the active fields
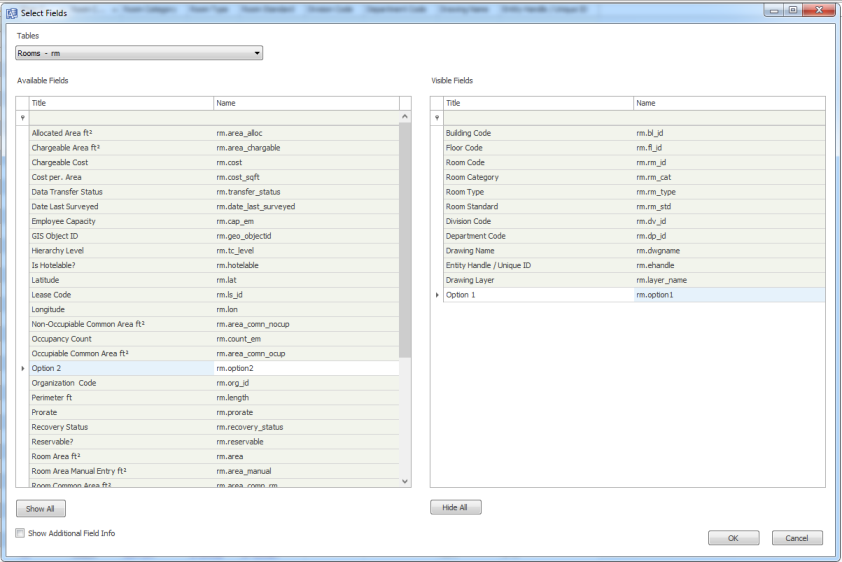
The View/ Fields command presents the Select Fields form, with which you set visibility by dragging fields between the Available Fields list and the Visible Fields list. You can change the order in which the view displays fields by dragging them within the Visible Fields list.
Note: The selections you make are not saved when you move to another view. You must save the edited view to make your selections a permanent view definition. See Saving Views.
To set a view's visible fields and their display order:
-
From the Smart Client, load a grid view by selecting a task from the Navigator.
- Select the View / Fields command from the Ribbon.
The Select Fields form appears.
- Select the table: From the Tables list, select the table whose fields you want to set. The Tables list presents the table-groups in the active view. You can control the fields of each table-group within the view.
- Search for fields. Since some tables contain many fields, you may need to search for the field that you want to display. Use the filter row at the top of Available Fields and Visible Fields lists to locate the desired fields to display or hide.
- Type the first few characters of the field title in the filter row, and the form updates to include just the fields whose title beginning with those characters.
- If you are searching by field name, you can type any consecutive letters, not just those at the beginning the field name. Also, you do not need to type the table name. For example, if searching for the
area_manualfield in the Rooms table (rm.area_manual), you do not need to typerm, and you could typeman. - For a more complex search, you can enter a character in either the Title or Name fields and choose the Edit Filter button. This activates the Filter Editor with which you can enter multiple filter conditions combined by logical operators.
- Once you locate the field, you can work with it as described below.
- Include fields in the view: The Available Fields list shows the fields for the selected table-group
that are not currently displayed in the view. Use these methods:
- Click and drag a field from the Available Fields list to the Visible Fields list. When dropping the field in the Visible Fields list, you can drop it at the desired position.
- Double-click on a field in Available Fields to move it to the bottom of the Visible Fields list. You can then drag it to the desired position.
- Click "Show All" to make all fields visible.
- Hide fields in the view: The Visible Fields list shows the fields currently displayed in
the active view. Use these methods:
- Hide the unnecessary fields by clicking and dragging them from the Visible Fields list to the Available Fields list.
- Double-click on a field in the Visible Fields list to hide it.
- Click "Hide All" to start fresh and hide all fields except the primary key fields. The view always includes these fields and locates them at the top of the Visible Fields list so that you can enter primary keys when creating new records.
- Position the fields: Rearrange the order in which to display the fields in the active view by clicking and dragging them to the desired position in the Visible Fields list. The view places fields starting at the left of the gird, so that the topmost field in the Visible Fields list will be the leftmost field in the view's grid.
- Note the following:
- Show Additional Field Info: By default, the form lists the Field Title and the Field Name. Select the Show Additional Field Info check box to show the Size, Data Type, and Archibus Type for the field.
- Security Groups: If your site is using security features, only those fields for which you have at least review-level access appear in the Select Fields form. If you are not a member of the Review Group for a particular field, the form filters that field out so it cannot be selected.
- To return to the view and have it reflect your changes, click OK.
- To choose fields from another table shown in the view, repeat steps 3 to 8. When you select another table, a message appears asking if you want to show the fields you just selected in the view. Click Yes to show those fields in the view in addition to the fields you are about to select.
- Save your view changes. See Saving Views
Note: The Smart Client grid can show calculated fields that have been defined by hand in the .axvw file. However, you cannot add calculated fields via the Smart Client user interface