Assets / Enterprise Assets / Project Proposal Console
Managing Project Proposals from the Project Dashboard
From the Project Dashboard, you can review and manage comprehensive information for a project, add actions, milestone actions, manage team members, add communication logs, and documents. To access a project, you must be the project requestor or a team member. For this reason, adding team members is important so that the appropriate people have access to the project
The Project Dashboard enables you to work with the following:
- Project Information. See Reviewing and updating project information.
- Milestones / Teams / Logs / Docs: A series of tabs enables you to store key information for your project. For step-by-step instructions for adding team members, see Adding Team Members. For information on each of these tabs, see Managing milestone actions, team members, logs, and documents.
- Work Packages . Work packages enable you to organize your actions into related tasks. See Managing Project Work Packages.
Note: In order to view floor plans in the PowerPoint generated from project data, the floor plan must have a markup, and the markup must be associated with an action for a work package.
- Actions for project work packages. By specifying the tasks that need to be done, actions enable you to track the cost and schedule for a project. See Managing Actions for Project Work Packages
This topic includes the following information:
The project information pane displays Project Profile information that may be helpful while reviewing or adding work packages and tasks.
The Cost Est. - Baseline summarizes the baseline costs entered or action items or the project.
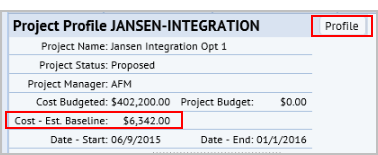
Use the Profile button to open the complete Project Profile. The Profile includes detailed data, such as documents, costs, contacts, and the Project Manager for the project. You can enter the Project Description, Summary, Scope, and Benefit, and can upload documents, such as the Project Business Case, Risk Management, Charter, and Implementation Plan.
For a description of the data entered for a project, see Create or Edit My Projects
When working from the Milestone, Team Members, Logs, or Documents tabs, use the export icon ![]() to export the data to DOCX or XLS format.
to export the data to DOCX or XLS format.
The following describes working from each of those tabs.
Milestones
From the,Milestone Tab, you can add or edit milestones that mark critical junctures in the project's progress. Milestones are project action items, but with a special Action Type of ‘PROJECT – MILESTONE’. Create milestone actions to help you track project progress.
Milestones with a status of Completed or Closed, or with a Percent Complete value of 100% are marked with a green check mark.
Manage team members
From the Team tab. , you can add or edit information for team members. These team members can be company employees, or people outside the company – vendors or other contractors.
Note: When adding a Vendor, Craftsperson or Contact, you can select an existing value in the database or add a new value by clicking Add New.
To add a team member:
- From the Project Dashboard, select the Team tab in the lower left pane.
- From the Team tab, select Add > and then select Employee, Vendor, Craftsperson, or Contact from the list.
The list of available team members of the type selected appears.
- Click ‘Add New ...’.
The appropriate form appears.
- Select the check boxes for the team members you want to add, and click Save Selected.
The team members are shown in the list in the Team tab. They are added to the database as a contact, craftsperson, vendor, or employee. For proposed projects, the team members are also added to your Project Team, so that they can access the project.
Add project logs
From the Logs tab, you can add project logs to record the communications that you have had concerning a project. For example, logs can be used to attach amended or finalized contracts, to record that contracts have been signed and mailed, or to record project status notes. When you add the log, you can attach the document. After you have saved the log, its data becomes read-only except for the Priority setting:
To add a project log and attach a document:
- From the Project Dashboard, select the Logs tab in the lower left pane.
- Click Add, and select a communication type (Notice, Correspondence, or Meeting Notes) from the list that appears. To create a different type of log, select More Options and select from the longer list of Communication Types on the Add Communication Log form.
- Enter the Comm. Log Code. This is the unique identifier for the log.
- In the Summary field, enter the description of the communication.
- Select a priority for the log. Select a High or Urgent Priority setting to have the log appear with a star icon that indicates it is a project Alert.
Note: The only thing you are able to change after saving a log is the priority. If an issue has resolved, you would want to change the priority level to remove a log from the Alerts.
- Click Save.
The Edit Details tab appears.
- On the Edit Details tab, enter additional information, such as the Contact Code, and if this item is associated with an action item, select the Action Item ID. When you click the Select Values button for the Action Item ID list, a selection form shows action items defined for the project.
- To attach a document, click the Check in New Document arrow next to the Document field.
- Optionally, enter a Description. For example, if you are attaching a document, describe what information the document contains.
- When you have added all information and attached the document, click Save on the Edit Details tab. Be sure that all information is entered and any documents are attached before clicking Save, as you can edit only the Priority for a log after you have saved it.
Attached documents can be opened directly from the grid by clicking on the document icon.
Store documents for project actions
From the Docs tab, add or edit any documents or drawings associated with any action for the project. Documents added from this tab are also project action items, but with a special Action Type of ‘PROJECT – DOCUMENT’.
Note: The Docs tab also shows documents included with any type of action. Since both Milestones and Change Orders are types of actions, documents stored with either of these are shown here.
Note: If you create an action to store a document or drawing, it should be used specifically for this purpose. You should not assign any additional values to this action.
To add and view a document:
- From the Project Dashboard, select the Doc tab in the lower let pane.
- Click Add.
The Document Profile form appears.
- Enter an Action Title that clearly identifies the action the document is for.
- Select a work package and project phase from the list.
- Click Save.
The Attach tab appears.
- Click the Check in New Document arrow next to the Document field, and locate the document.
- Click Save on the Attach tab.
- Attached documents can be opened directly from the grid by clicking on the document icon.

To edit document details:
- Click on the record for a document in the grid.
The Edit Document Details form appears.
- You can edit information for the progress, location, costs, or the description for the action item associated with this document.
- Make changes and click Save int he Edit Document Details form.
Proposed projects have the Project Type of Scenario. If your business process owner has added reference documents that are associated with Proposed projects, you can view and edit details for these documents from the Reference Documents tab on the Project Dashboard. For information on how these documents are associated, see Managing Reference Documents.
To view reference documents:
- From the Project Proposal Console, select a project on the Select Projects tab, and then select the Project Dashboard tab.
- From the Project Dashboard, select the Ref Docs tab.
If a document is associated with this Project Type, the document name is shown in the Reference Documents pane.
- Click the document name as this is a link to open the document.
A message appears asking if you want to open the document, or to save it to your system.
You can edit details for the document, such as the processes or action types the document is associated with. You can also check in a new version of the document, if needed.
To edit document details, or check in a new version:
- Click on the document in the Reference Documents pane.
A form appears that is used to associate the document with the project.
- Click the Document tab, and click the document in the list.
The Document pane fills in with details for the document. From this form, you can edit details for the document. For information on the data you can edit, see Managing Reference Documents.
- To check in a new version of the document, click the Check in New Version arrow next to the Document field.
- .When you have finished making your changes to the document details, click Save.
- Click on the document in the Reference Documents pane.
A form appears that is used to associate the document with the project.
- Click the Document tab.
- Click Add New at the top of the Documents pane.
The Document Details form appears.
- Enter information for the document. To see a description of the fields you can enter, see Manage Reference Documents.