How to Add a New User
System managers need to establish the users who have access to Archibus. Do so by editing the Archibus Users (afm_users) table.
To establish a user:
- Select the System / Archibus Administrator - User and Security/ Add or Edit Users task. This loads a view into the Archibus Users table, each record of which represents the user's account.
- Select the Add New User action. Enter a unique user name and password for logging into Archibus.
- Select a Role Name. The role dictates which Security Groups are granted to this user and which Navigator processes this user can see.
- Set Use CAD/BIM License? to Yes if the user is going to use the Extensions for AutoCAD and Revit. Set it to No if the Extensions for AutoCAD and Revit are not enabled for this user.
- Use the Save action to create the user record.
Optionally, you can set additional information for this user's account.
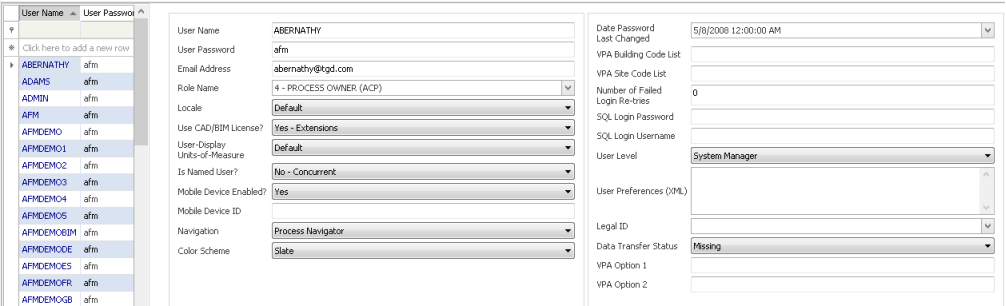
- Email Address. This is the email address to use for escalations and notifications. It is also the way the program looks up any associated Employee record information -- by matching the email address in the User's table (that is, the user's IT identity) with the email address in the Employees table (the users facility identity).
- Create Employee Record? If checked, the program will create an Employee record from the information you added in the Users table. You can later refine this record to assign the employee to a building, floor, room, division, department, standard, and so forth.
- Number of Failed Login Retries. This is the number of times the user tried to login and failed. The system administrator can unlock the locked user account by first clicking the "Reset" button (the ellipses next to the Number of Failed Login Attempts field), and then clicking Save.

- Locale. Is the locale set for the User's session when the user logs in. In multi-lingual deployments, the local dictates the language in which Archibus appears.
When using the Archibus VAT and multicurrency features, the Locale also determines the VAT Country that the application uses when getting the VAT Percent to calculate the VAT amount for cost transactions, and the currency used to display monetary values to the user when the User Default Currency is used.
- User Display Units of Measure: With the Archibus multi-unit features, this field controls how area and length values are displayed for the user.
- Default: When Default is selected, if the User Locale is en_US, the system uses Imperial units; for all other Locales, the system uses Metric
- Imperial: Imperial units are used.
- Metric: Metric units are used.
- Is Named User? Set this to Yes if this user is going to have their own dedicated license for Archibus. Otherwise, the user will sign out a concurrent license when they log in.
See the section on Virtual Private Archibus for information on the VPA settings for user accounts.
For an example on assigning security groups to a user, see Example: How to Prevent a User from Seeing Financial Data.
Note: Any change in roles or their assignments to users requires that you select the Flush Cached User Accounts and Roles button, located in the upper right corner of the Ad or Edit Users view. See the User Help topic, Archibus Web Central User's Guide / Archibus Administrator - User and Security / User Management / Flush Cached User Accounts and Roles.