Install Archibus Web Central with Apache Tomcat
This section covers details specific to the Apache Tomcat application server.
Installing Archibus with Tomcat
To install Archibus with Tomcat, open the archibus.war file, and expand it into the \webapps folder directly by creating a new \webapps\archibus folder, preserving sub-folders as you do so. Alternately and more straightforwardly, let the application server create the new directory and unzip the file.
To have the application server unzip the .war file and create the new directory:
- Copy the
archibus.warto your \webapps folder. - Start Tomcat to have the application server expand the .war file.
The expansion process will create a series of folders, such as:
\webapps\archibus\WEB-INF
\webapps\archibus\projects
\webapps\archibus\schema
... - Copy the
ai-licenses.binfile to the \webapps\archibus\WEB-INF\config folder. - Verify that your database server is started; then, start the Tomcat application server.
Once Tomcat is started, right-click the icon in the System Tray, then use Open Console Monitor and Shutdown selections as needed. When the Configuration Manager lists Archibus messages, the Archibus application is loading.
Other Tomcat Options
Using the Windows Service Manager
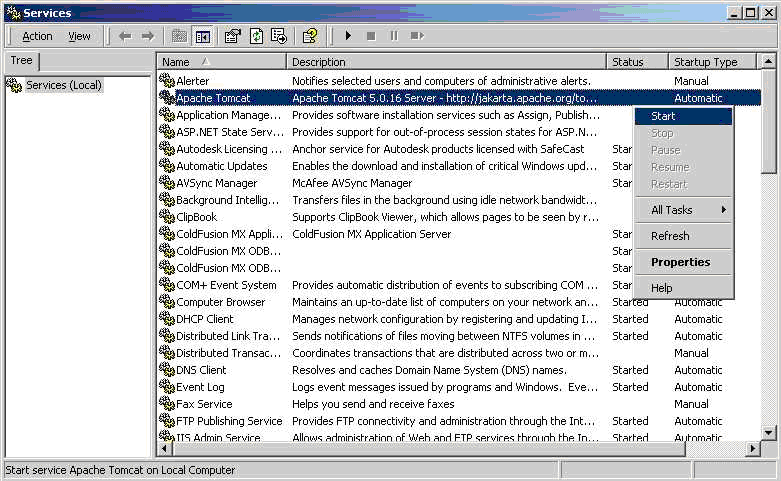
You can use the Windows service manager to start and stop Tomcat. This makes restarts easier.

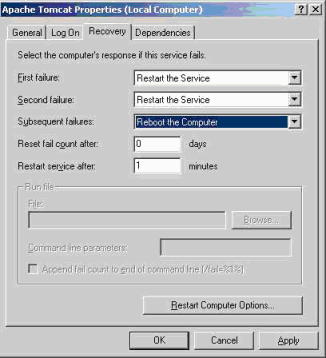
The service manager also gives you the option of having Tomcat restart the application server (and thereby restart Archibus Web Central) or even restart the computer should it encounter an error.
The service manager also gives you the option of specifying start-up dependencies -- such as a dependency on the database service, which must be running.

See Also
http://jakarta.apache.org/commons/daemon/procrun.html
Optional: Install the Archibus Online Help Systems Locally
Accessing online help from Web Central (either through the Help command or right-clicking on a Navigator process) automatically brings you to the latest help systems that are stored on the Archibus web site; for example,https://help.archibus.com/user_en/archibus.htm. Since the help systems stored on the Archibus web site are continually updated, accessing online help from here ensures that you are working with the very latest material.
Some sites, however, wish users to access online help from the company's network, rather than from the Archibus web site. In this case, you can install the help systems on your network by extracting them from the help zip files, available from Archibus Customer Service.
| Zip File | Extracts this Help System | Creates these folders |
|---|---|---|
| user_en_help.zip | Archibus User Help in English | user_en |
| system_help.zip | Archibus System Management Help, which is always in English | system |
| localized_help.zip | Archibus User Help in German, Spanish, French, Italian |
user_de user_es user_fr user_it |
Follow this procedure:
- Obtain the zip files from Archibus Customer Service.
- Copy the zip files to the ...\webapps folder and unzip the files. The above directories will be created.
- Restart Tomcat.
For information on accessing and configuring the locally-installed help systems, see Installing the Archibus Help Systems Locally.
Configuring Archibus
For other configuration settings, such as settings for connecting to your email server or for security, see Configuration Options.